Common Photography Terms for Beginner Photographers

Learning digital photography can be super intimidating especially with all the terms! There are so many dang terms out there that it can be crazy overwhelming.

Understanding the terms and lingo is crucial to be able to learn and grow your skills as a beginner photographer . It can take hours to read books, start googling each term, or watch youtube videos. I am here to make it a bit easier and quicker for you!

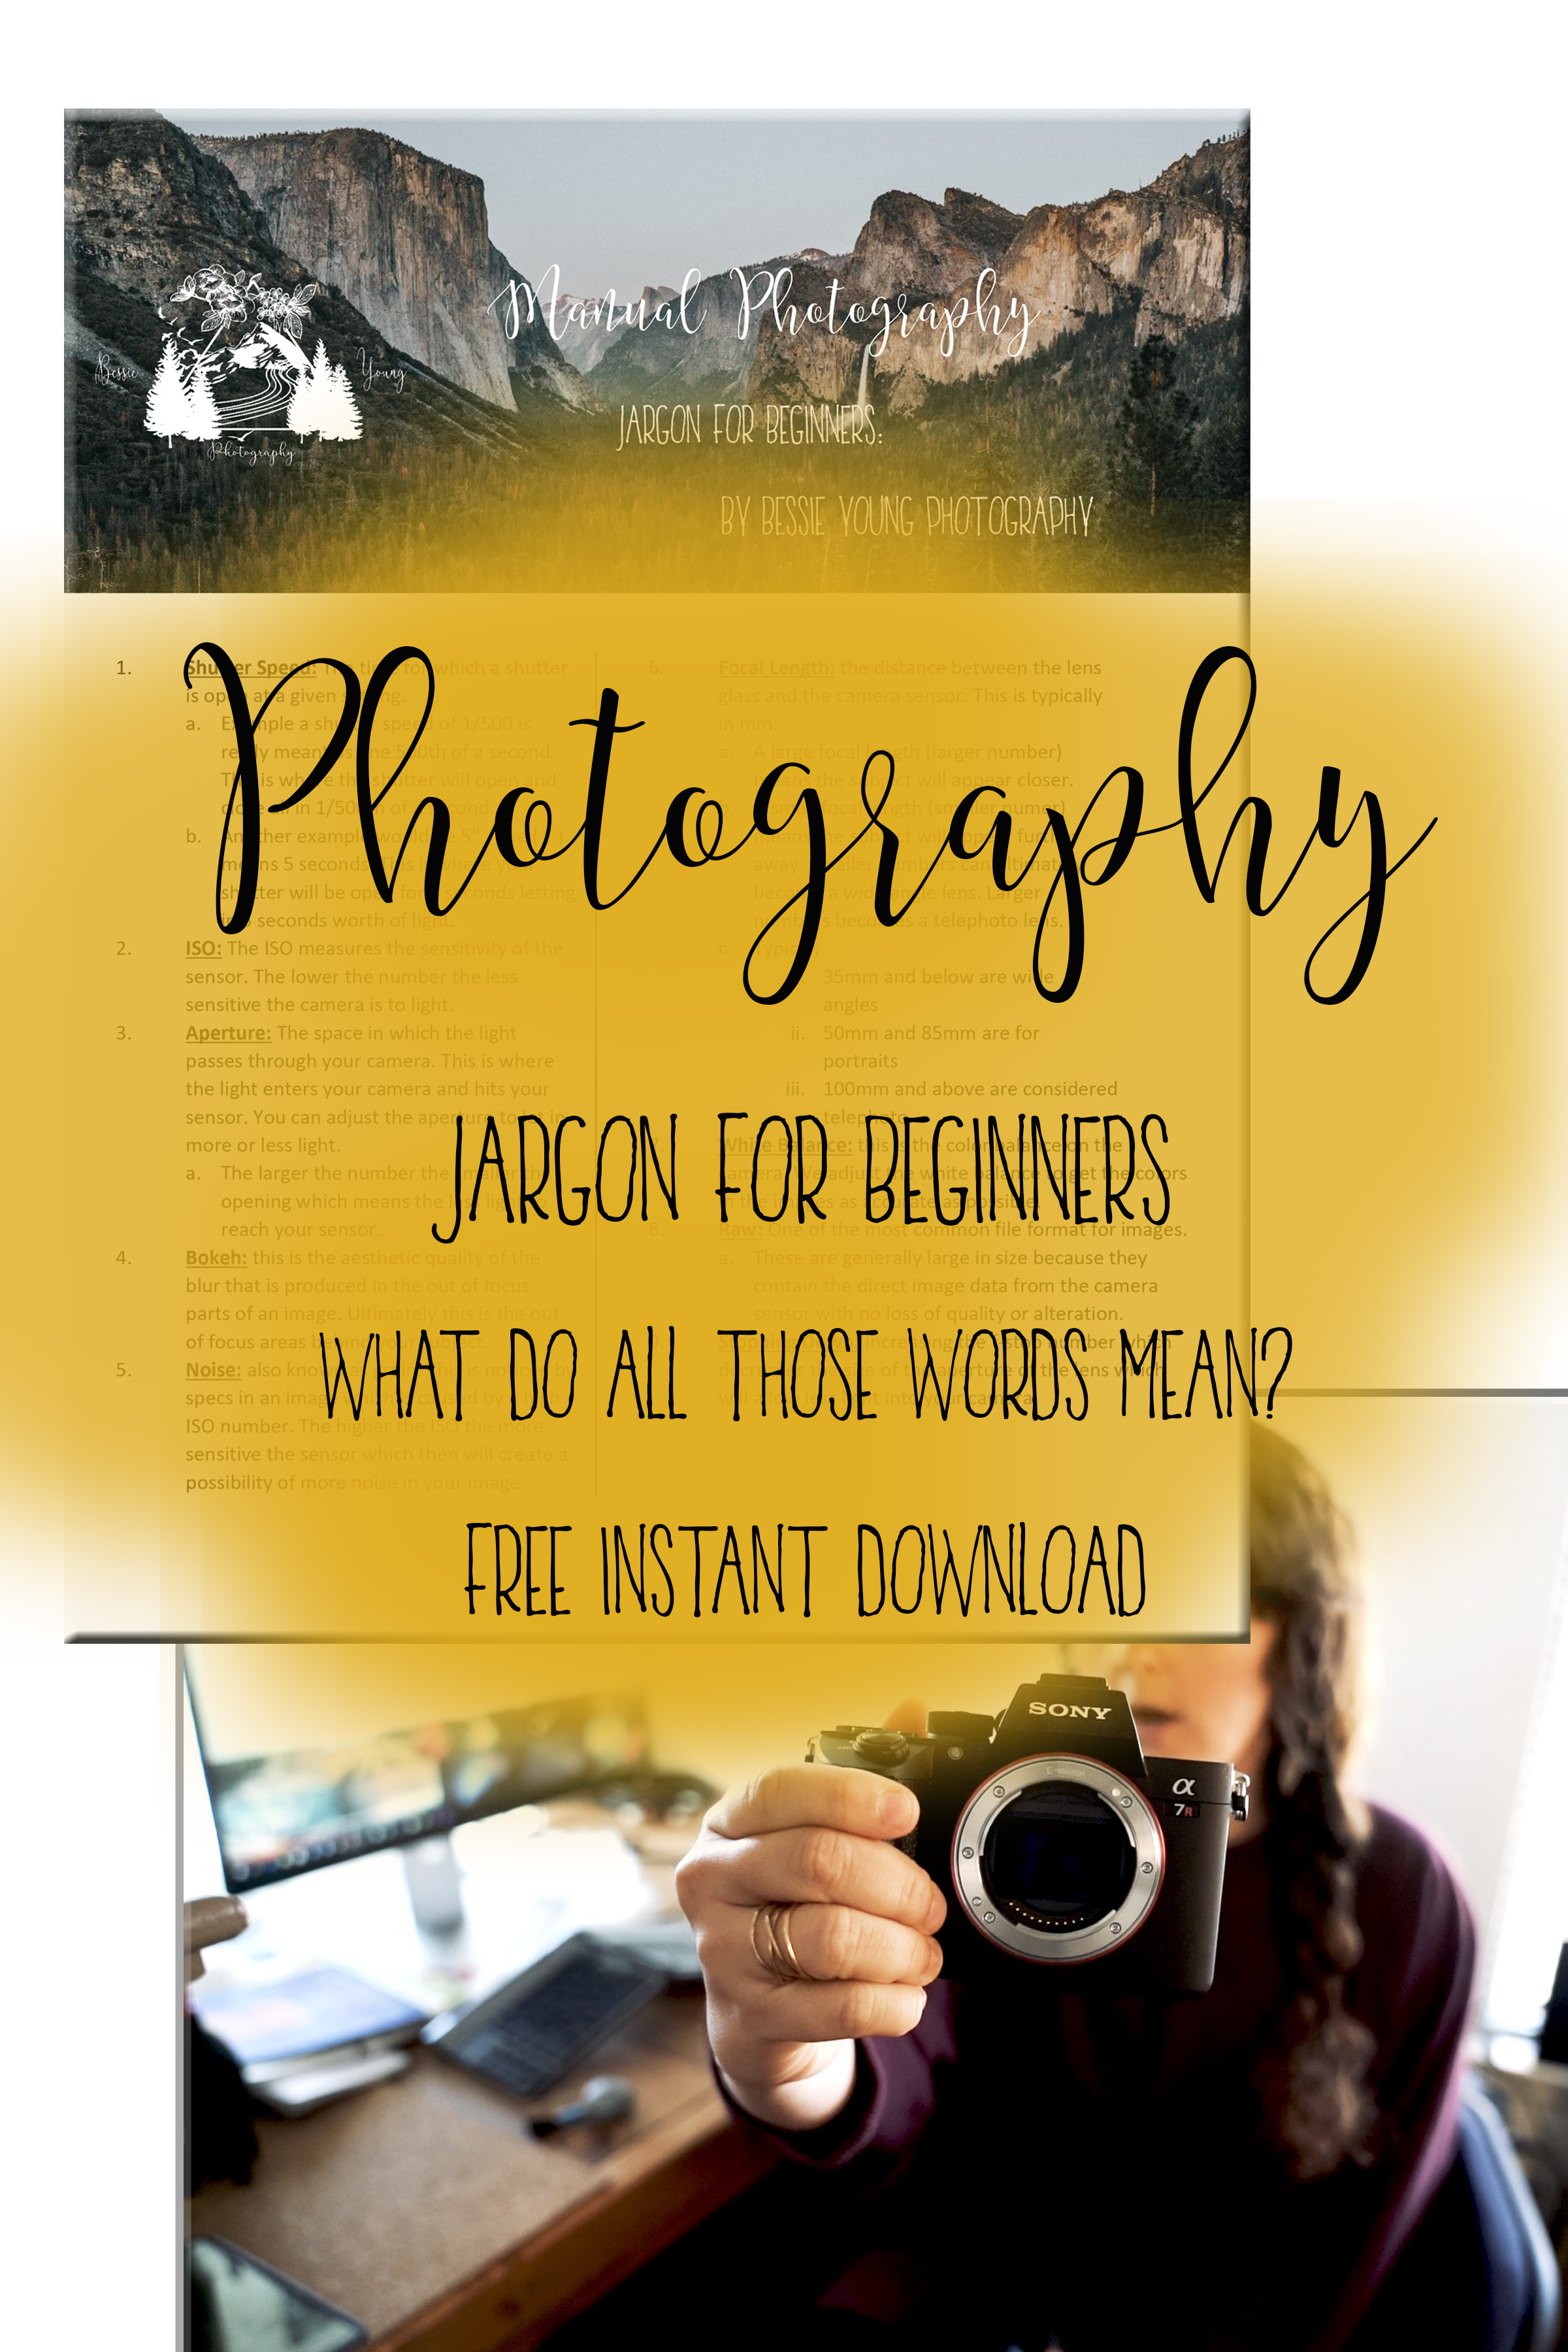
In this post you will read some of the most common photography terms and their definitions; however, if you want a large list of photography terms and their meanings make sure to download my free guide!


Most Common Photography Terms

Aperature

This is the most common term in photography that you should know. To put it simply, this is the size of the size of the opening in the lens. You can think of the lens as a window. The large windows or wide angles will let in more light. A wide open aperature will let in more light for a brighter image. Aperature is measured in F Stops. The lower the number the wider the aperature meaning the more light it will let in.

Most Common Photography Terms for Beginner Photographers by Bessie Young Photography - Photography tips and tricks - Learn Photography.jpg

Shutter Speed

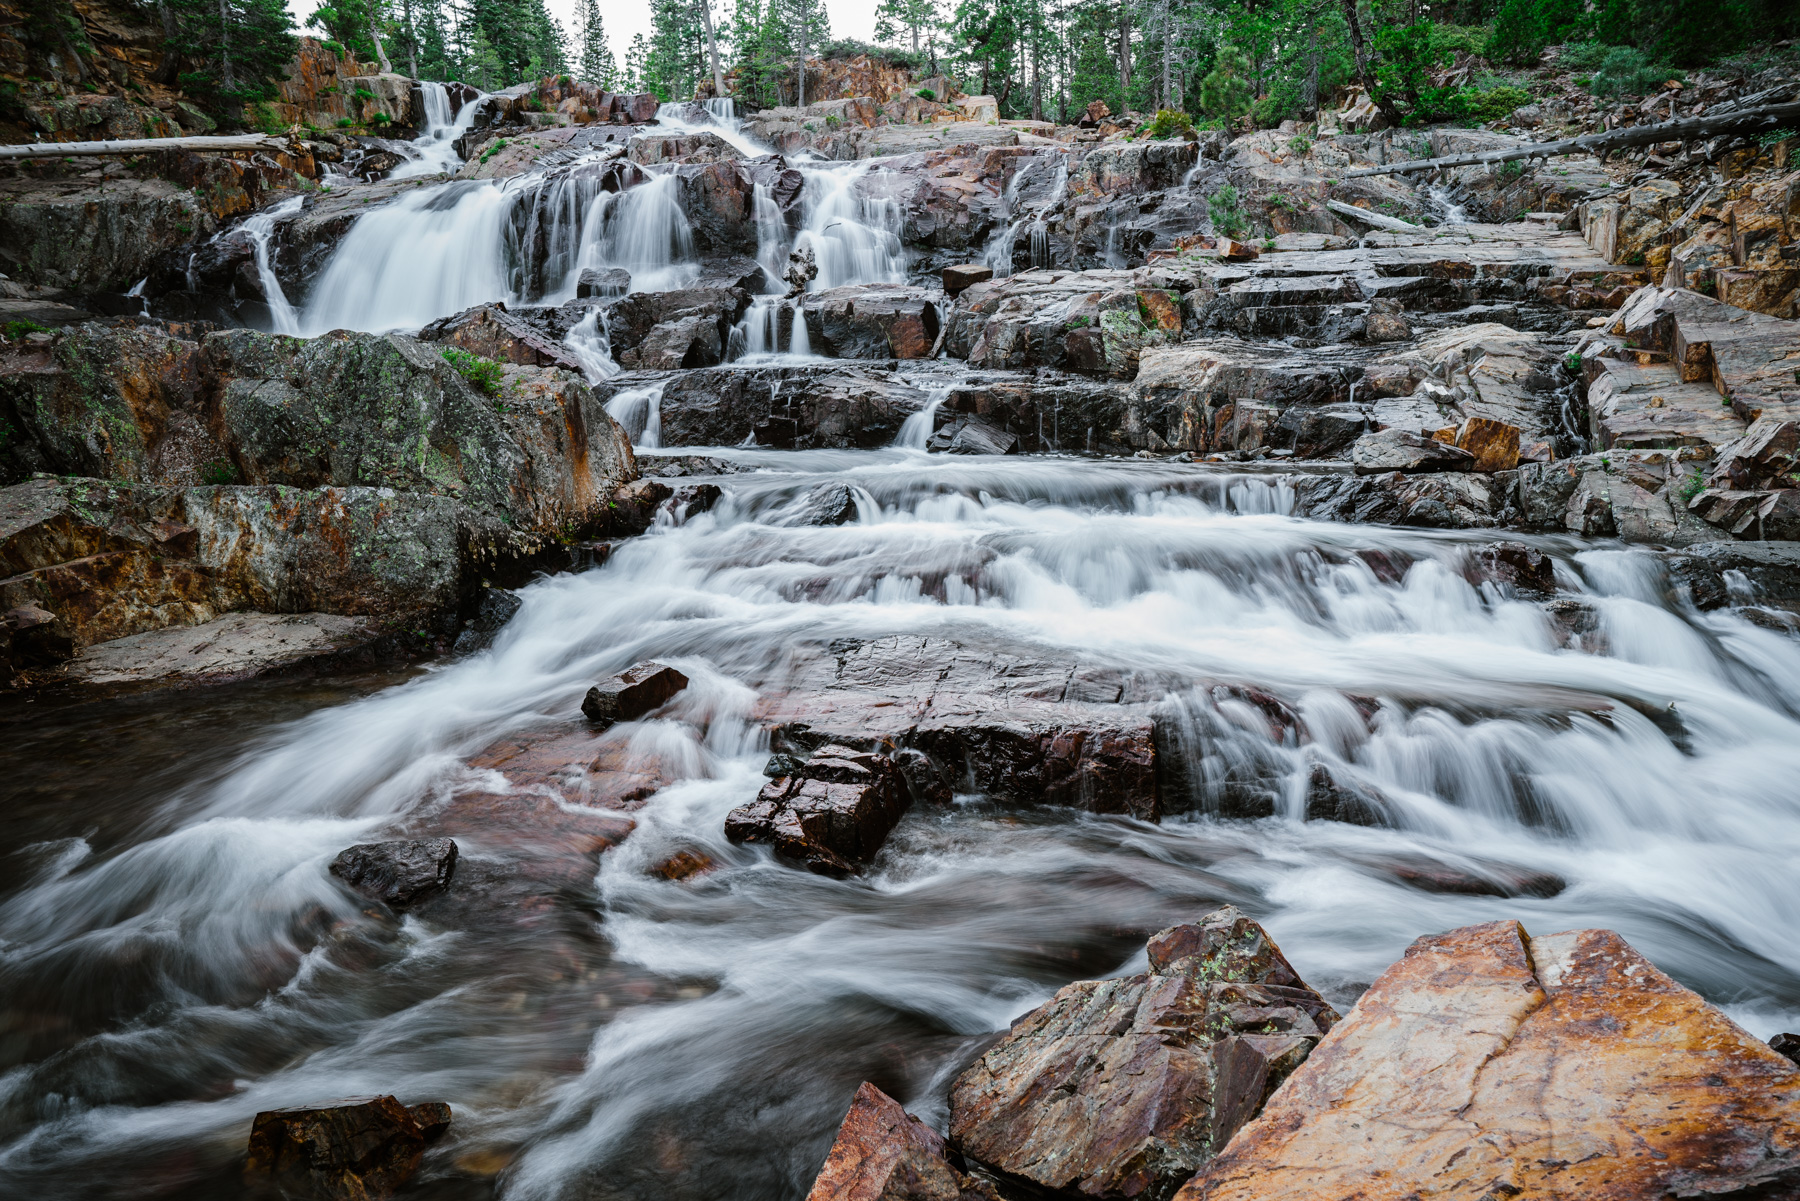
The shutter is the part of the camera that opens and closes to let light in. The shutter speed is how long the shutter stays open. This is written is seconds or fraction of seconds such as 1” (one second) or 1/200 (1 200th of a second). The longer the shutter stays open the more light that is let it. Note: anything that moves while the shutter is open will become blurry.
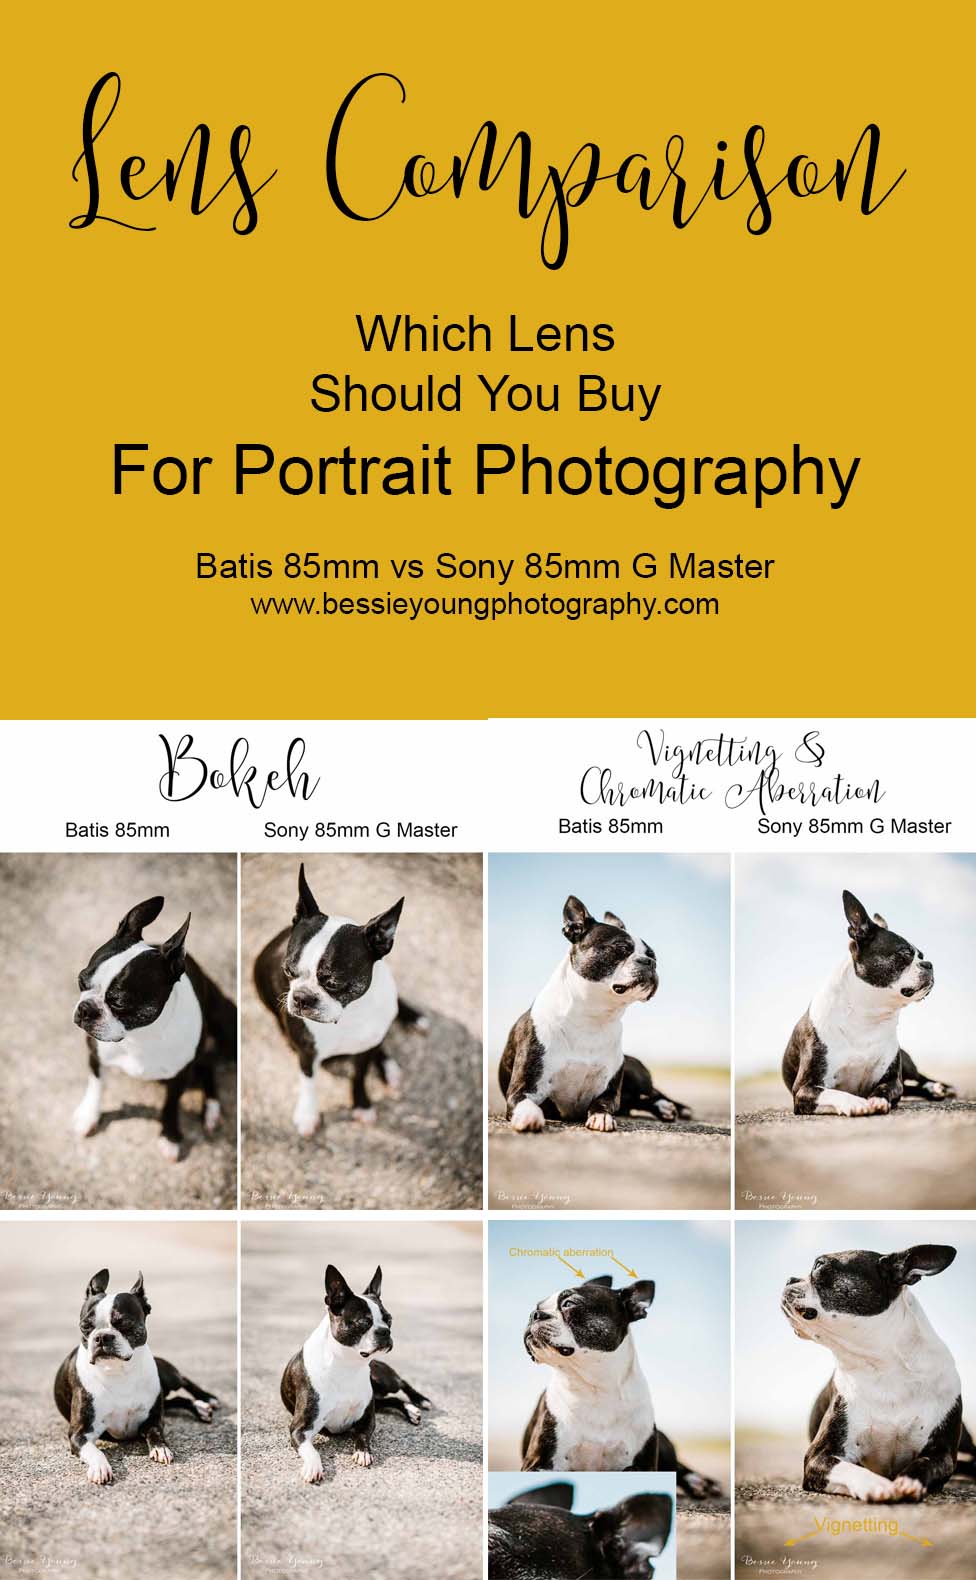
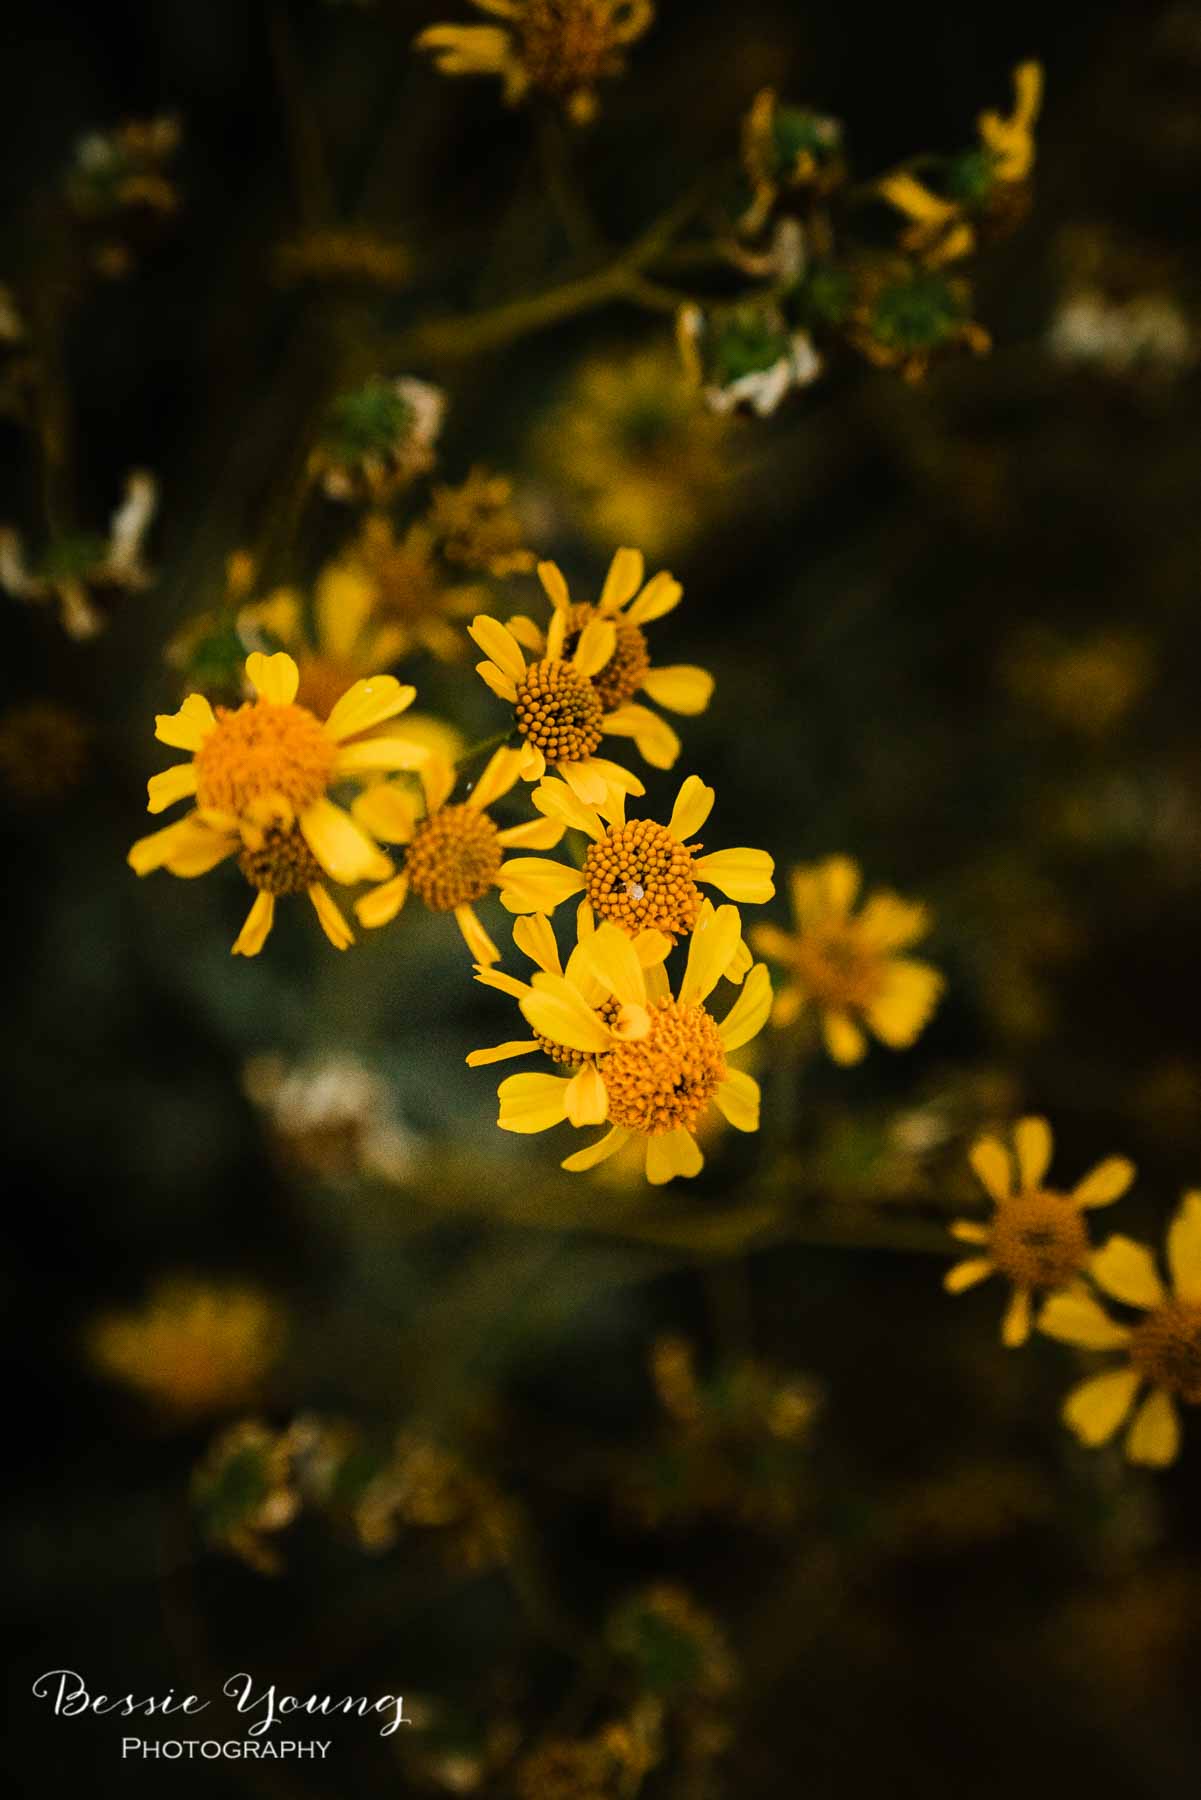
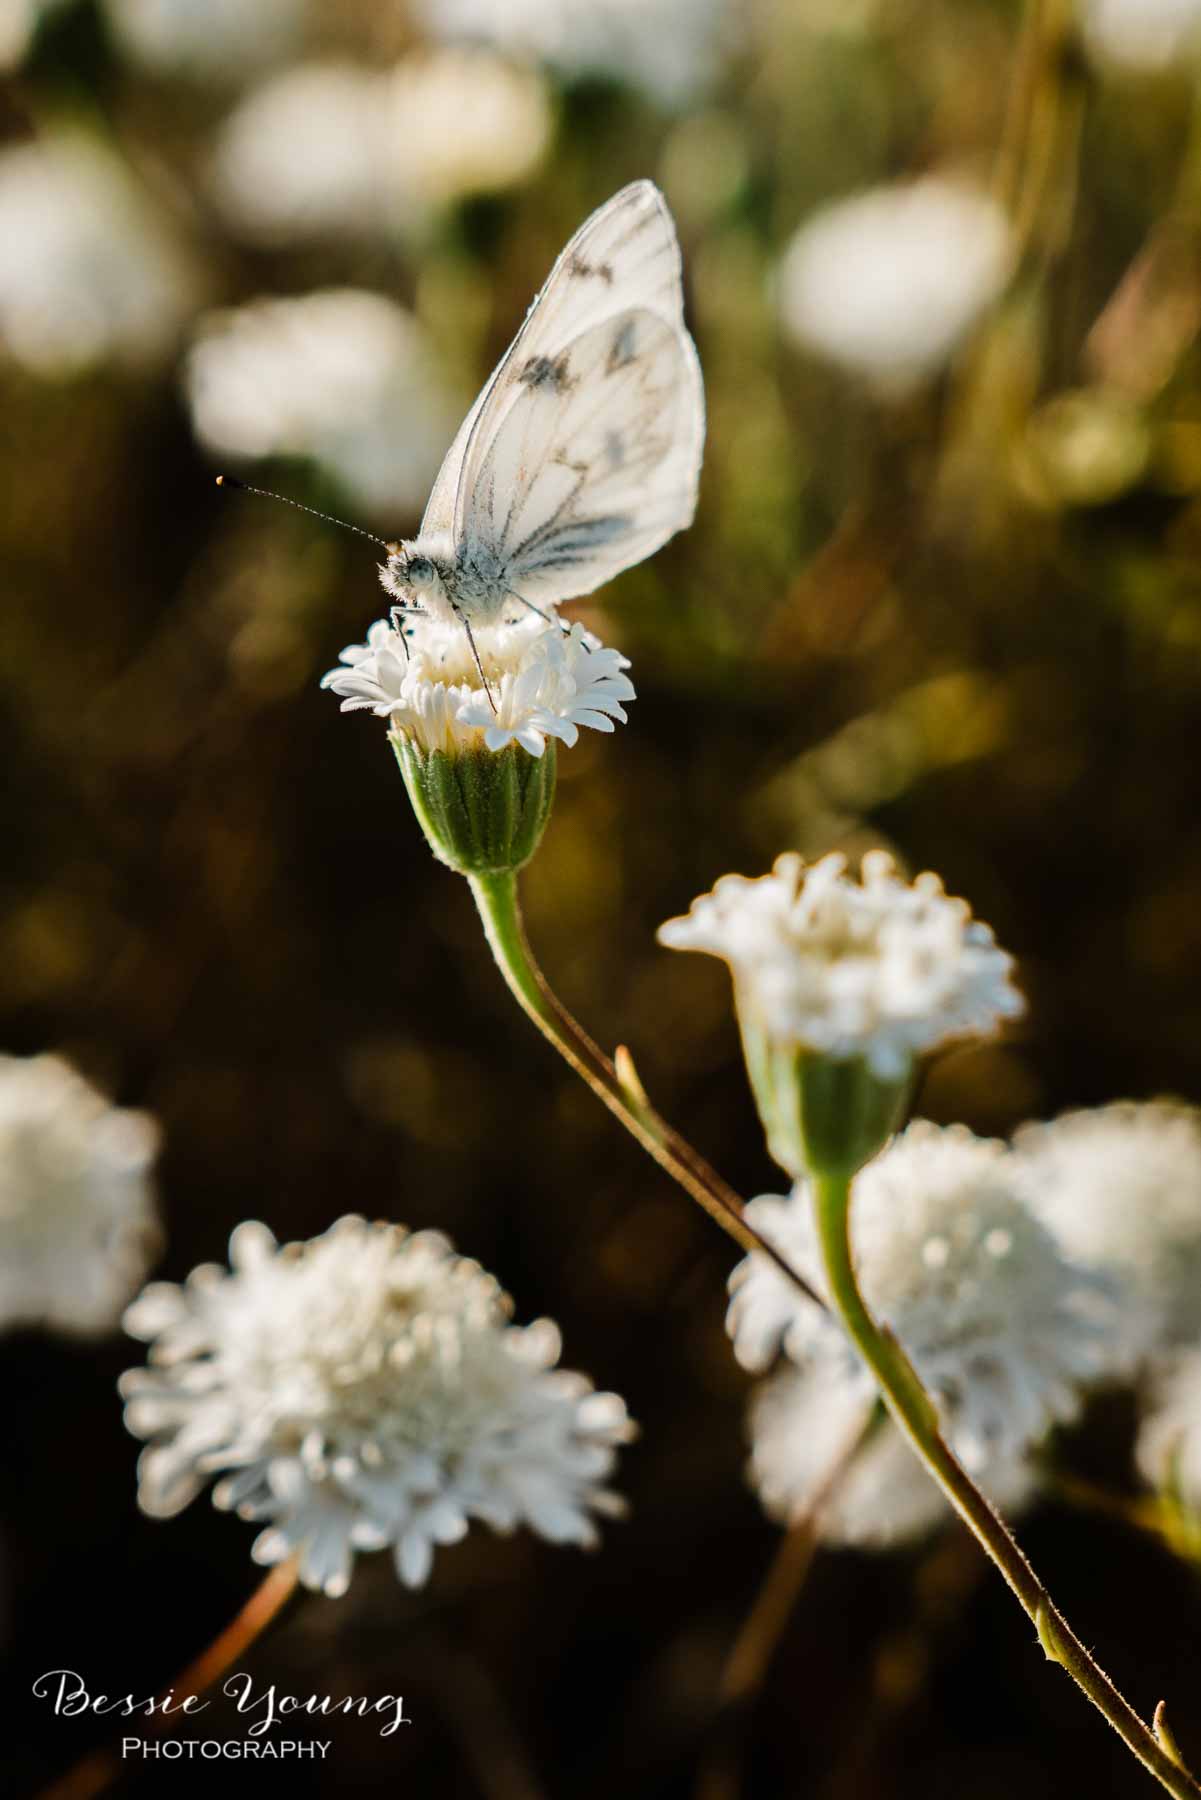
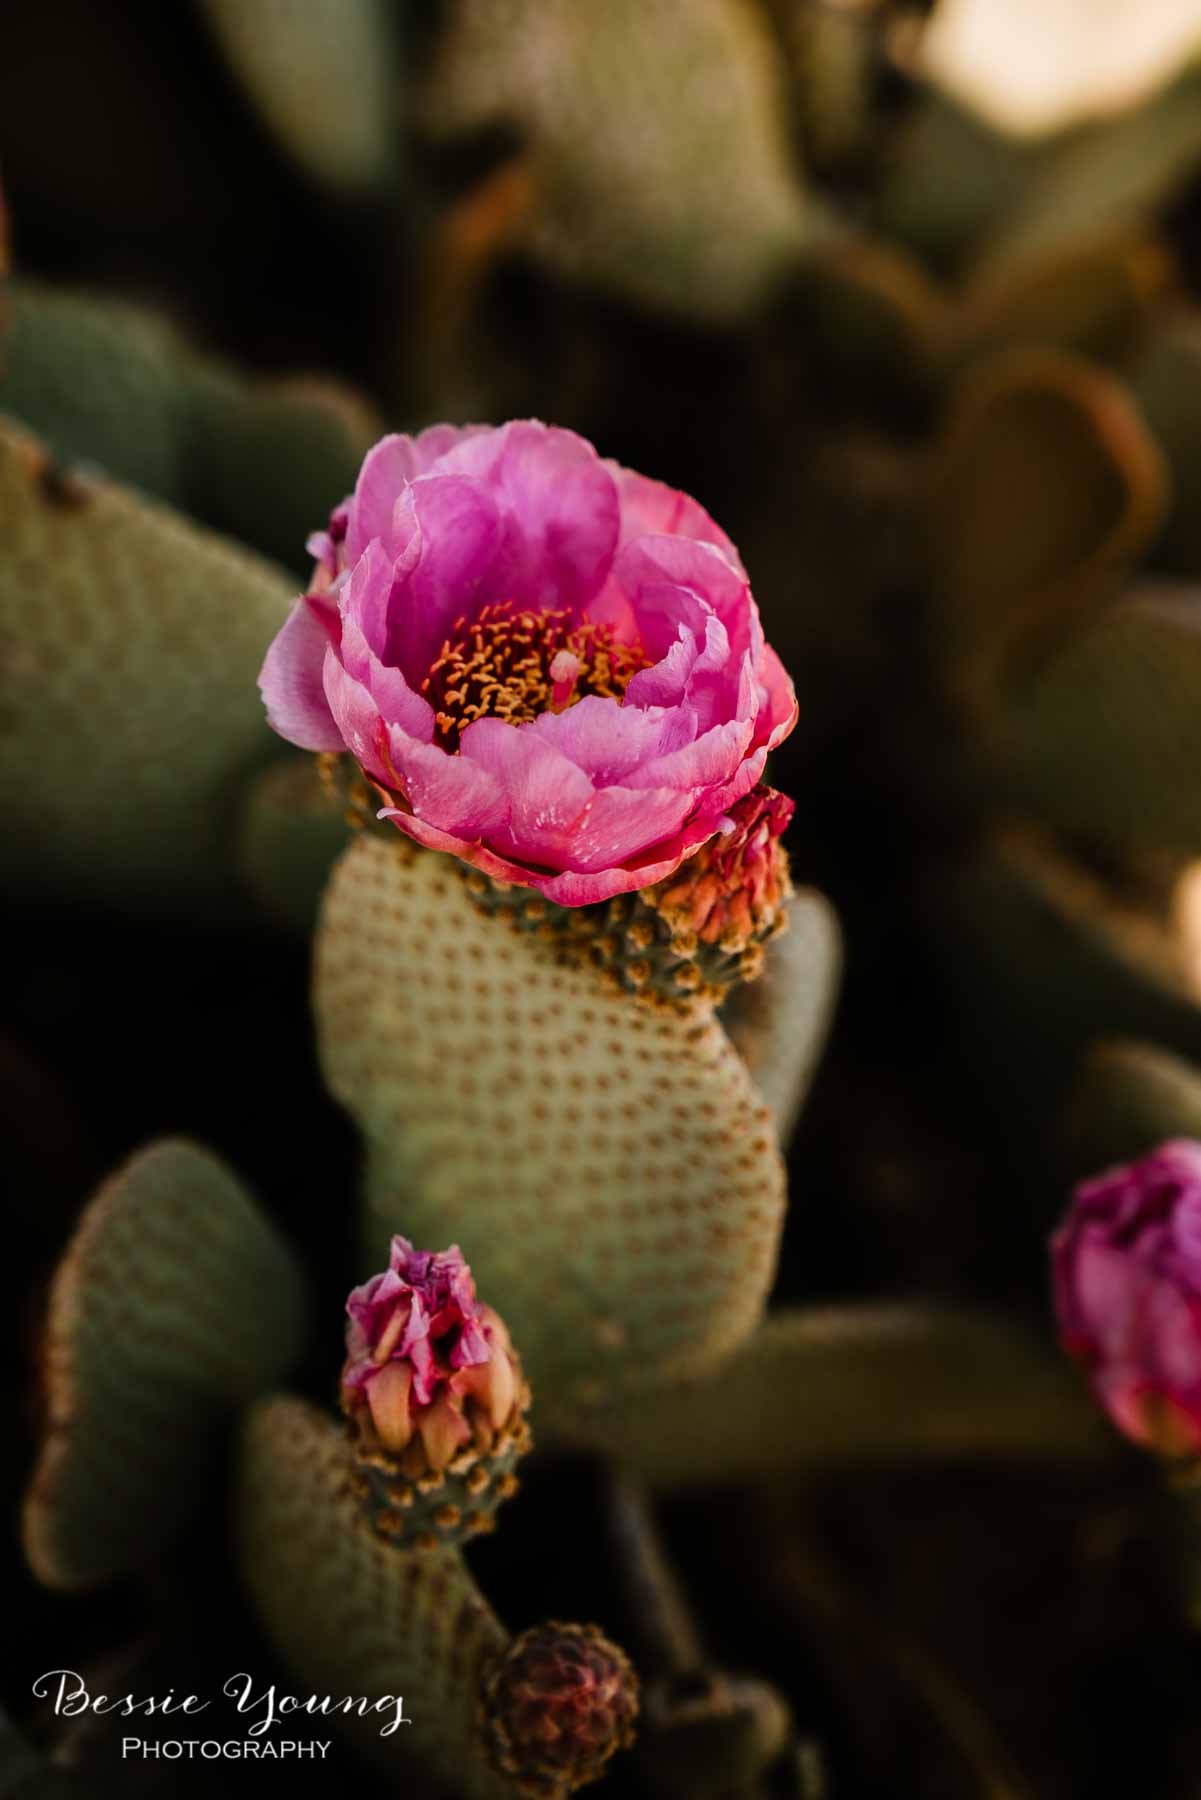
Bokeh

Bokeh is created when when light is out of focus in the image. It is that beautiful creamy background that everyone loves. This is created through a wide aperature.
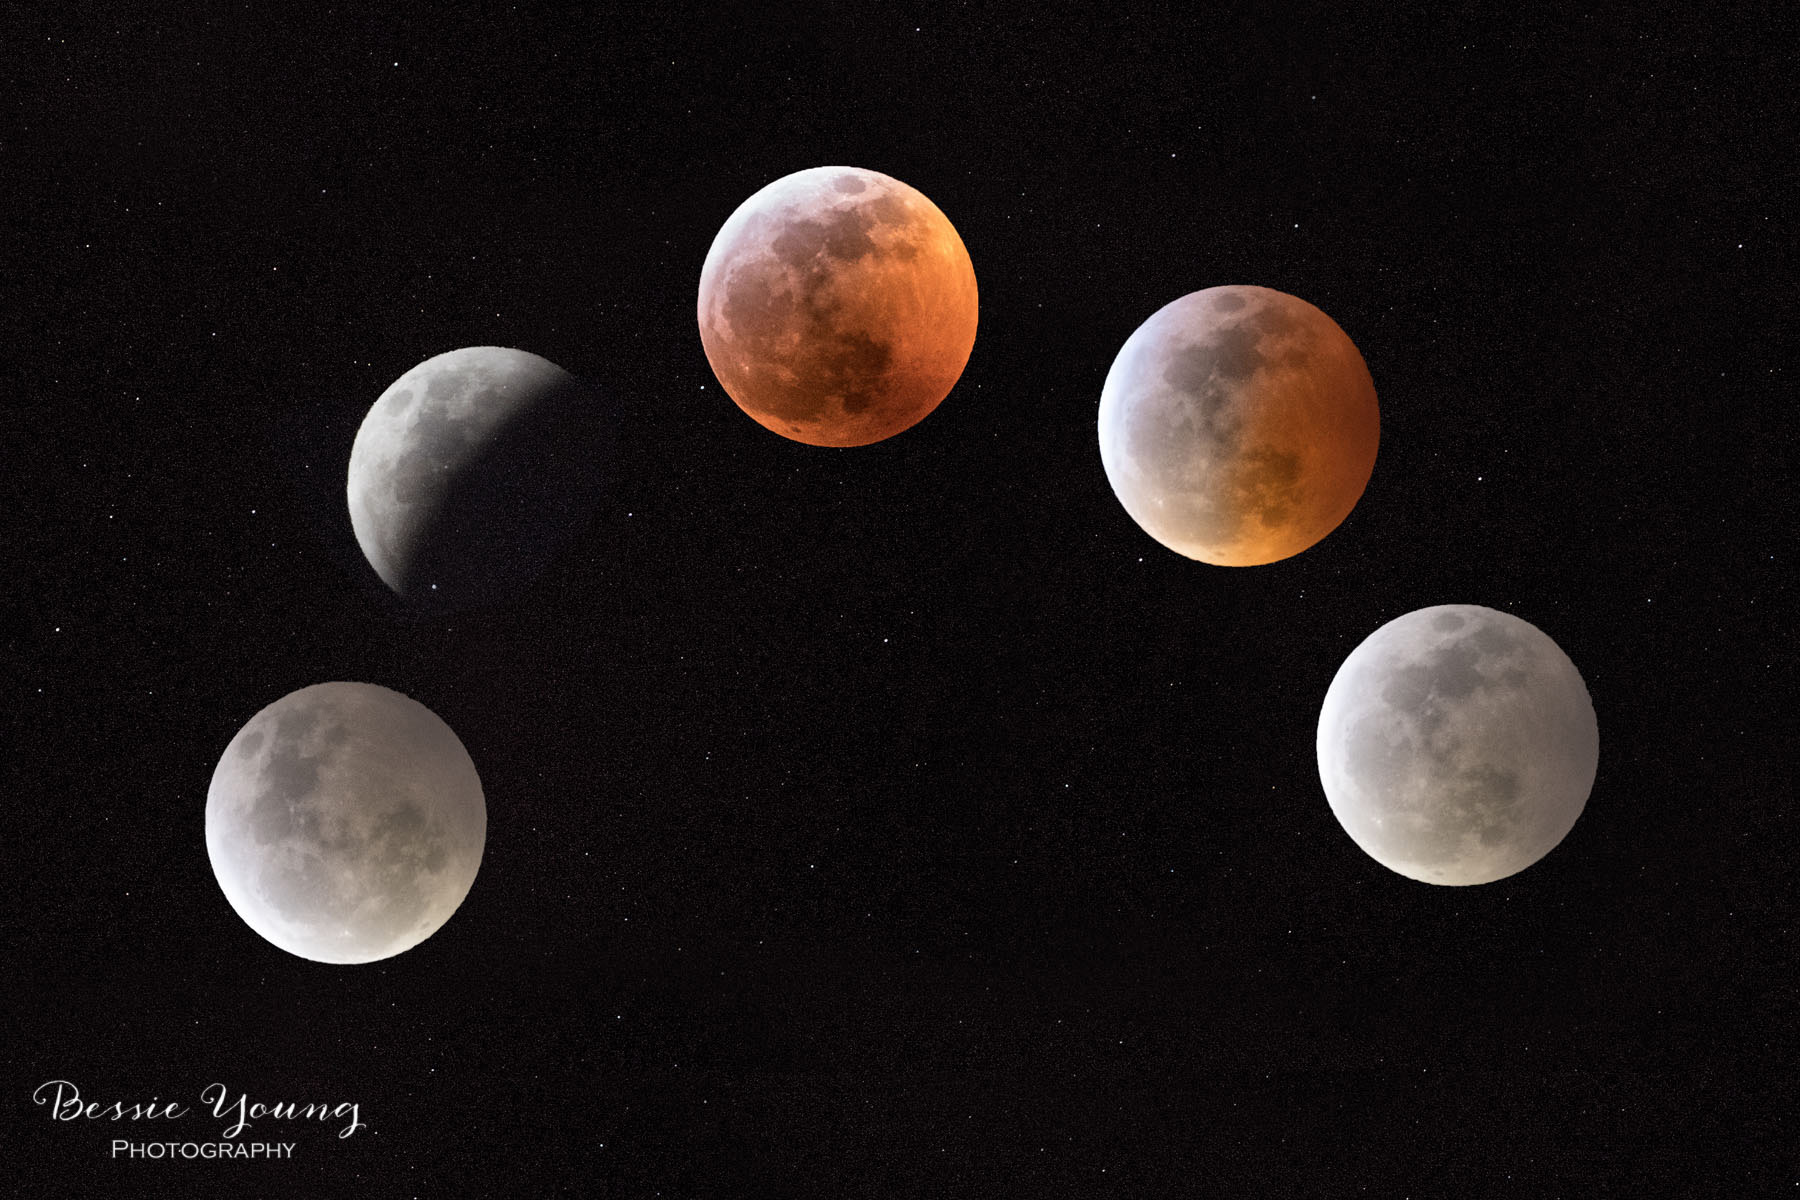
Burst Mode

You can take photos one at a time or you can use burst mode to have the camera take continuous photos as long as you hold down the shutter button, or until the buffer is full. Burst speeds will differ based on your camera. Some are faster than others and are measured in frames per second (fps). This mode is best when shooting something moving. You can get a bunch of photos all at once.

Focal Length

The focal length is shown in millimeters on a lens. This is the distance between the lens and the image it forms on the film. Essentially the focal length is how zoomed in your image is. So an 18mm will be a wider shot that a 35mm. A 70mm will be a much closer shot (or more zoomed in) that a 35mm.
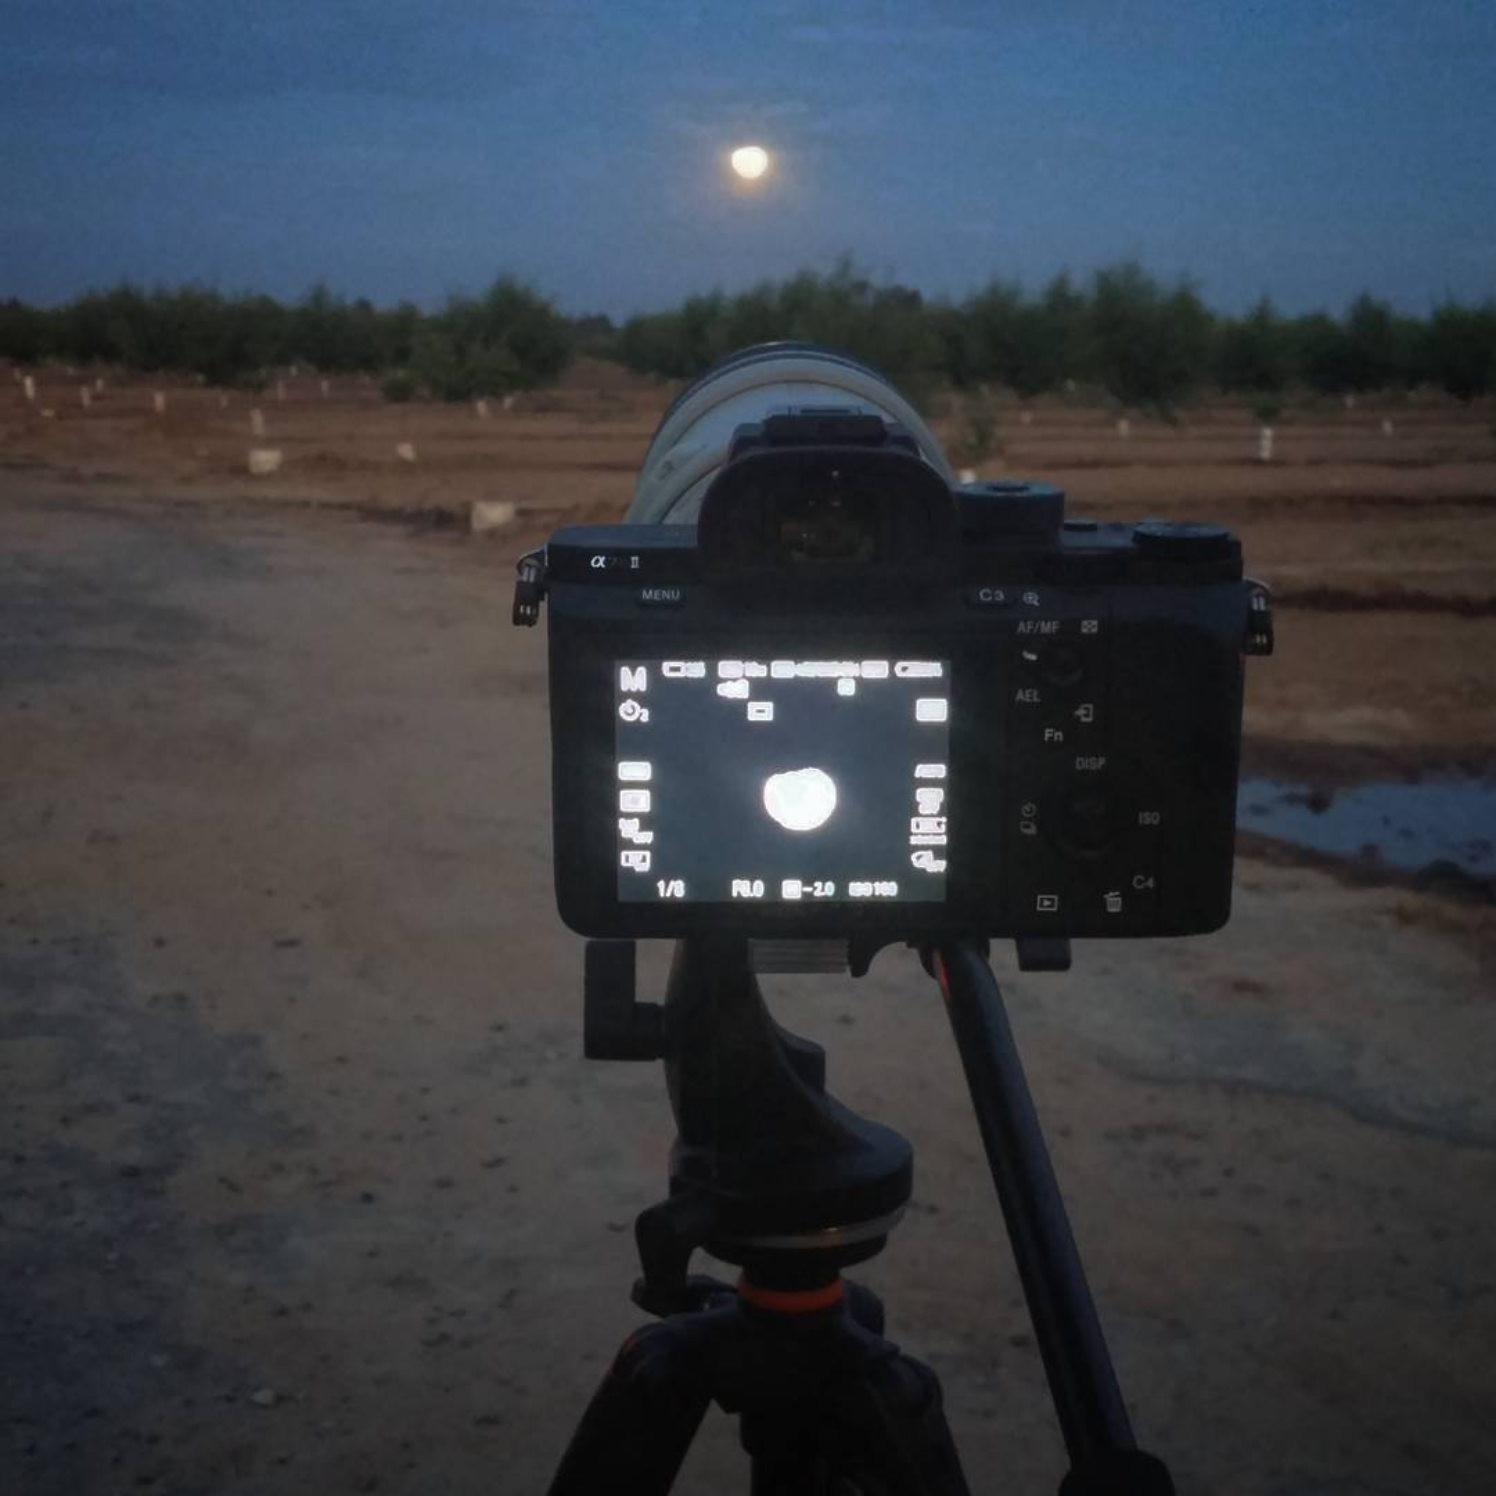
Manual Mode

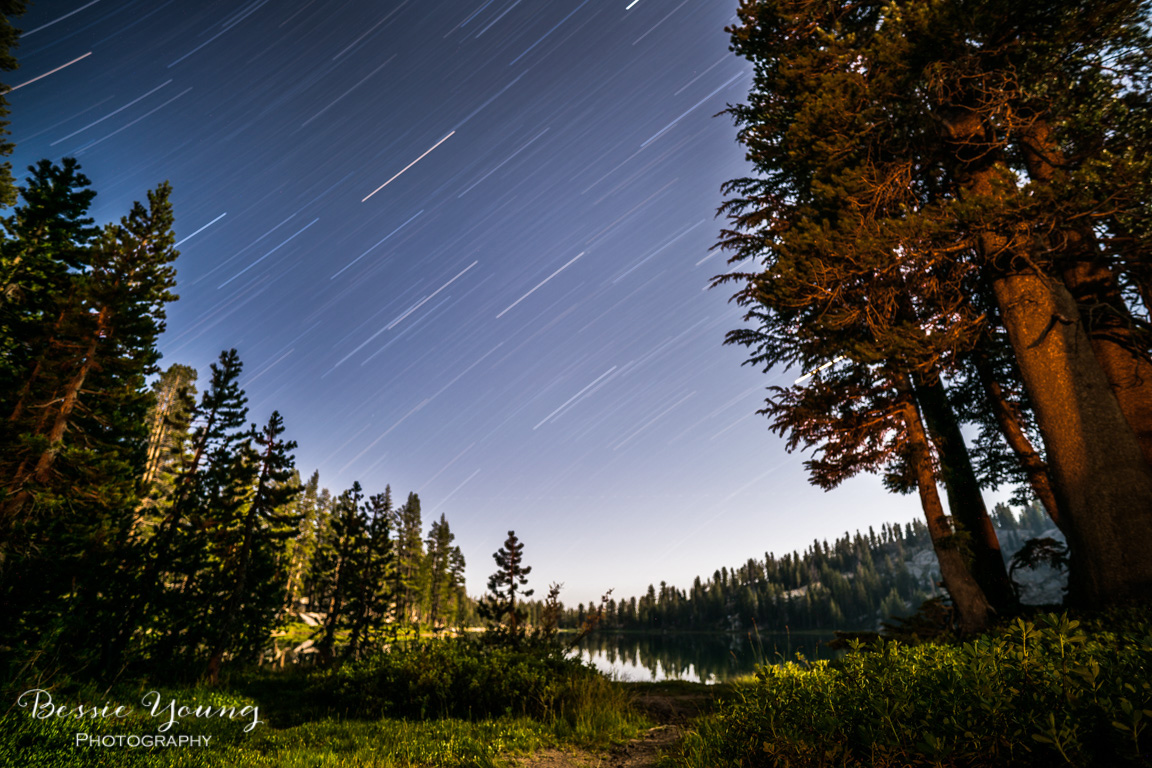
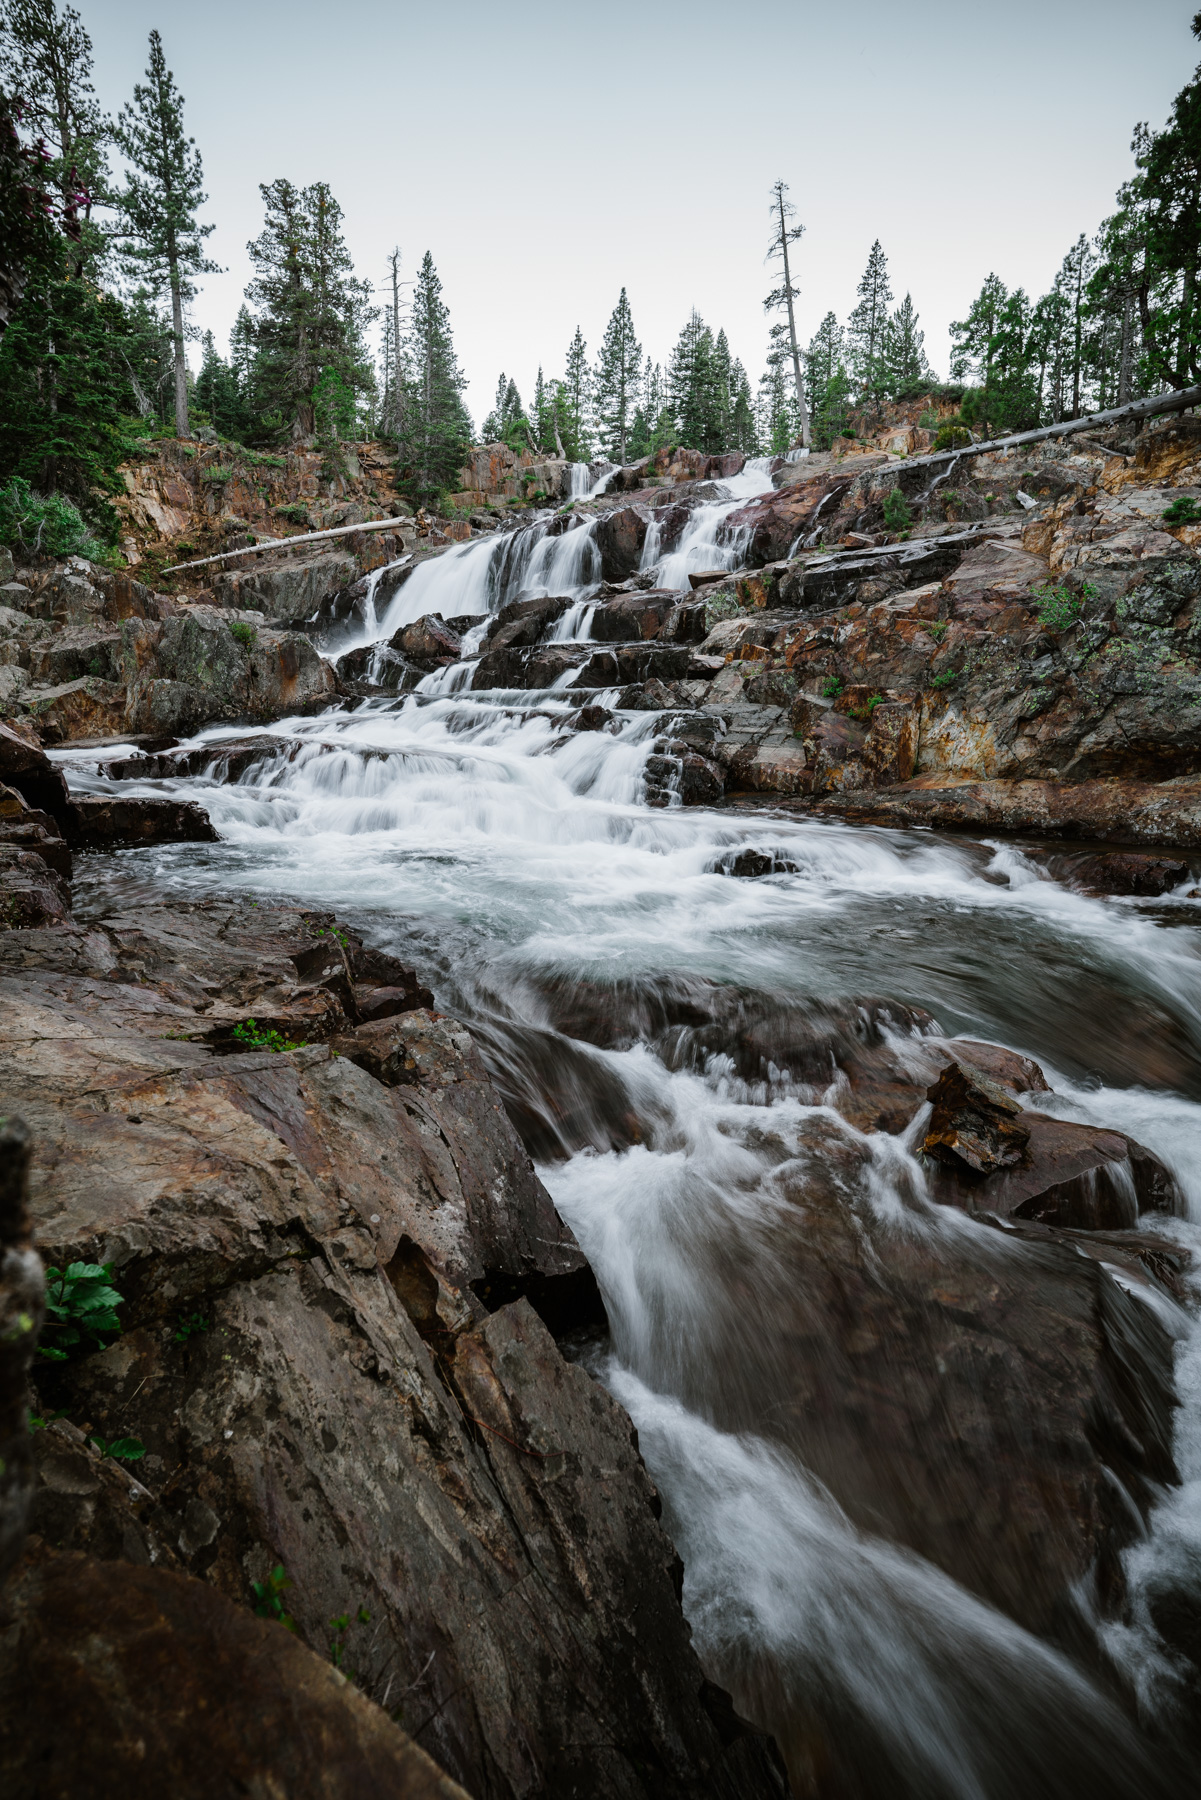
Manual mode allows the photographer to set the exposure rather than letting the camera make the decisions. In manual mode you will choose the aperature, shutter shutter speed, and ISO. This will allow you to add that artistic effect to your pictures such as bokeh in the background, smooth waterfalls, stars streaking across the sky, and so forth.

Manual may also refer to manual focus where you focus your lens rather than your camera doing it for you.
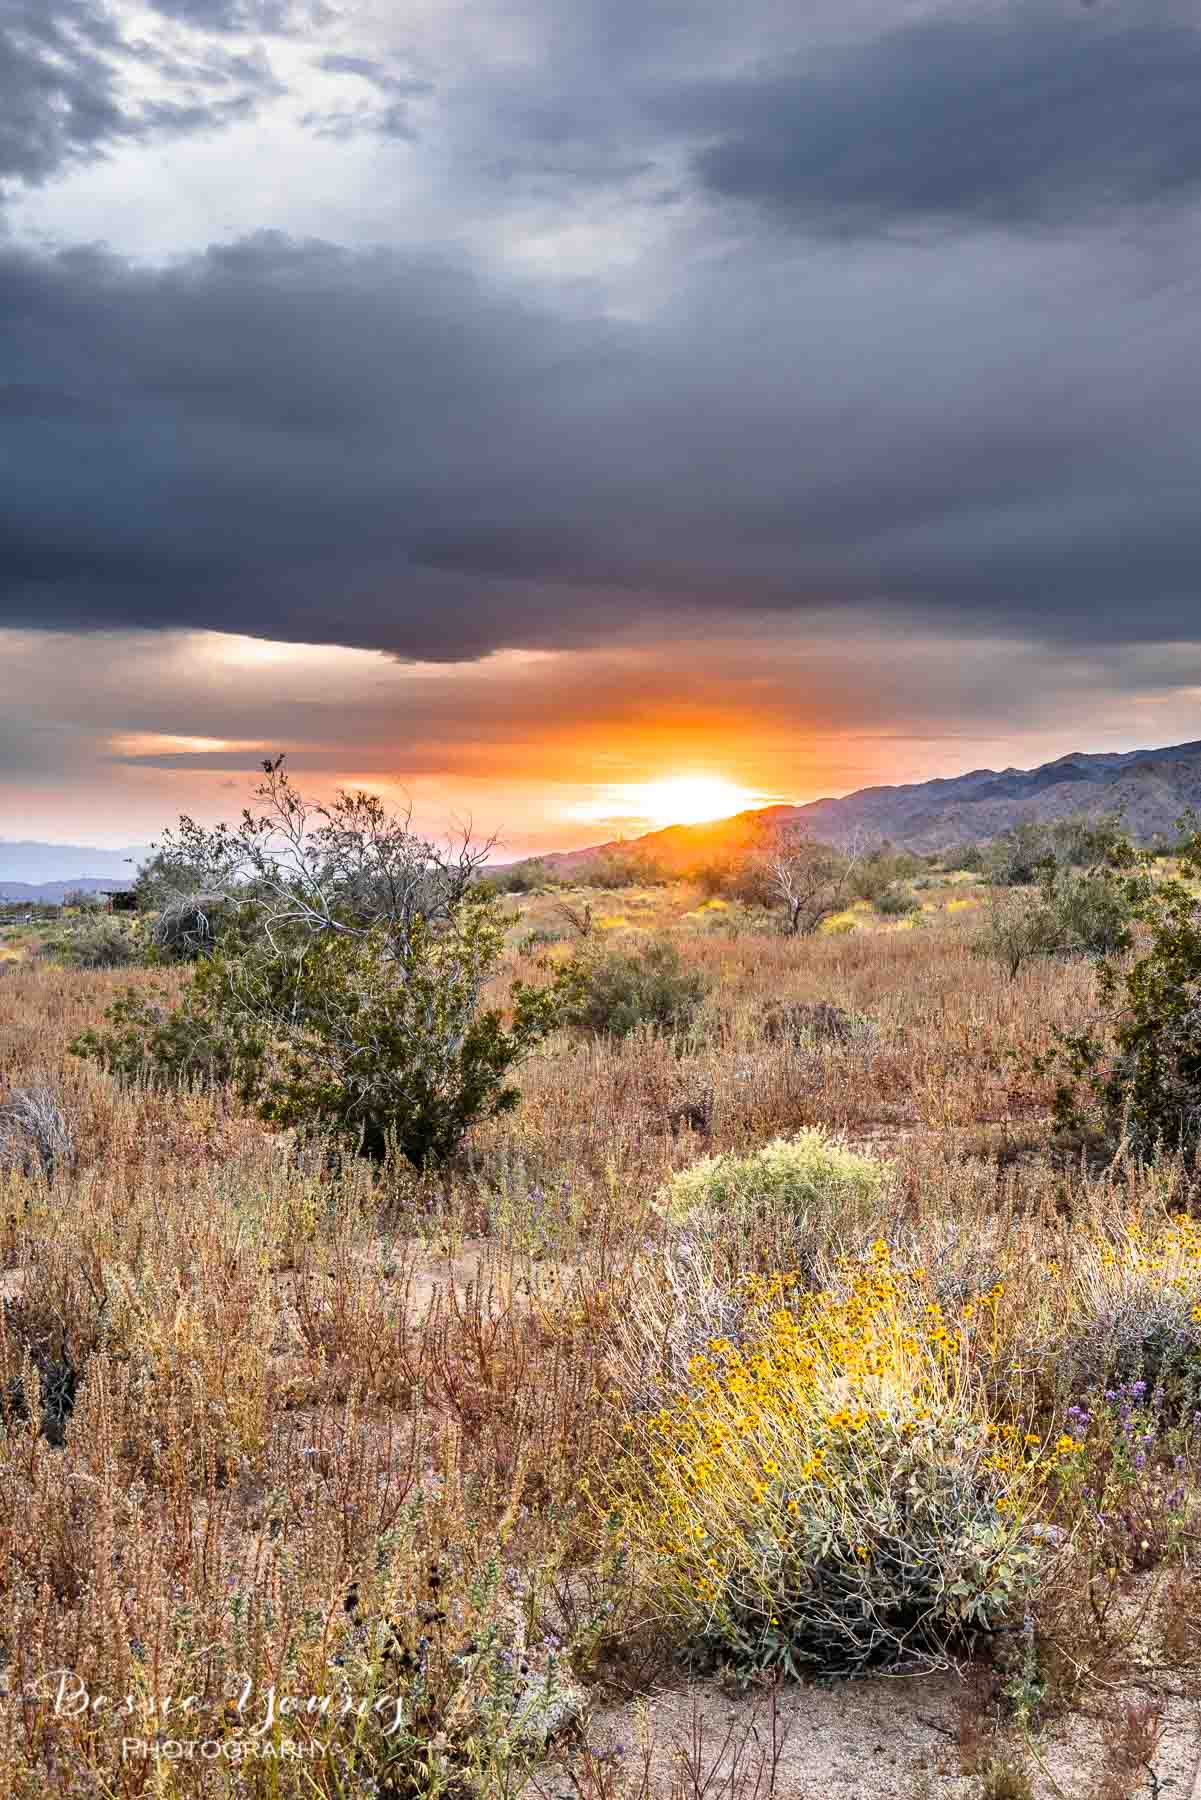
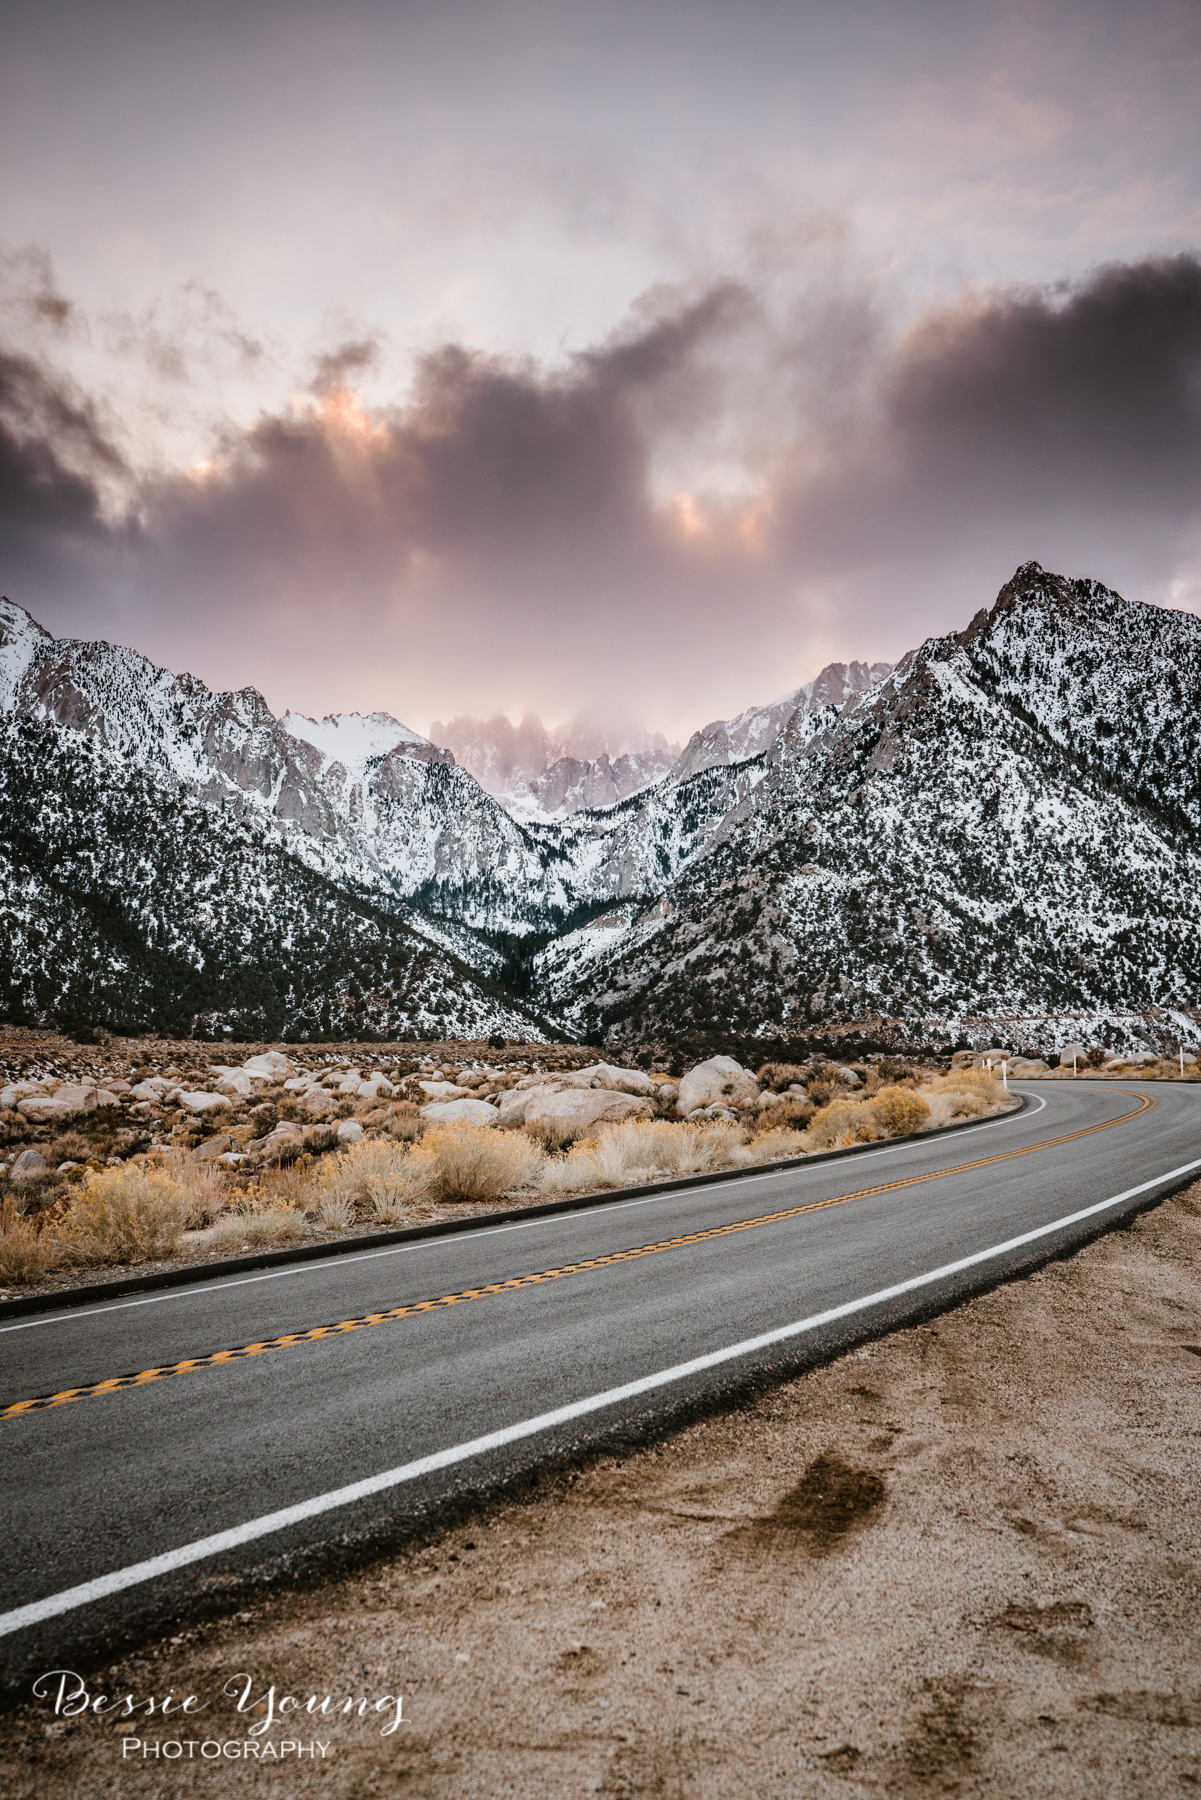
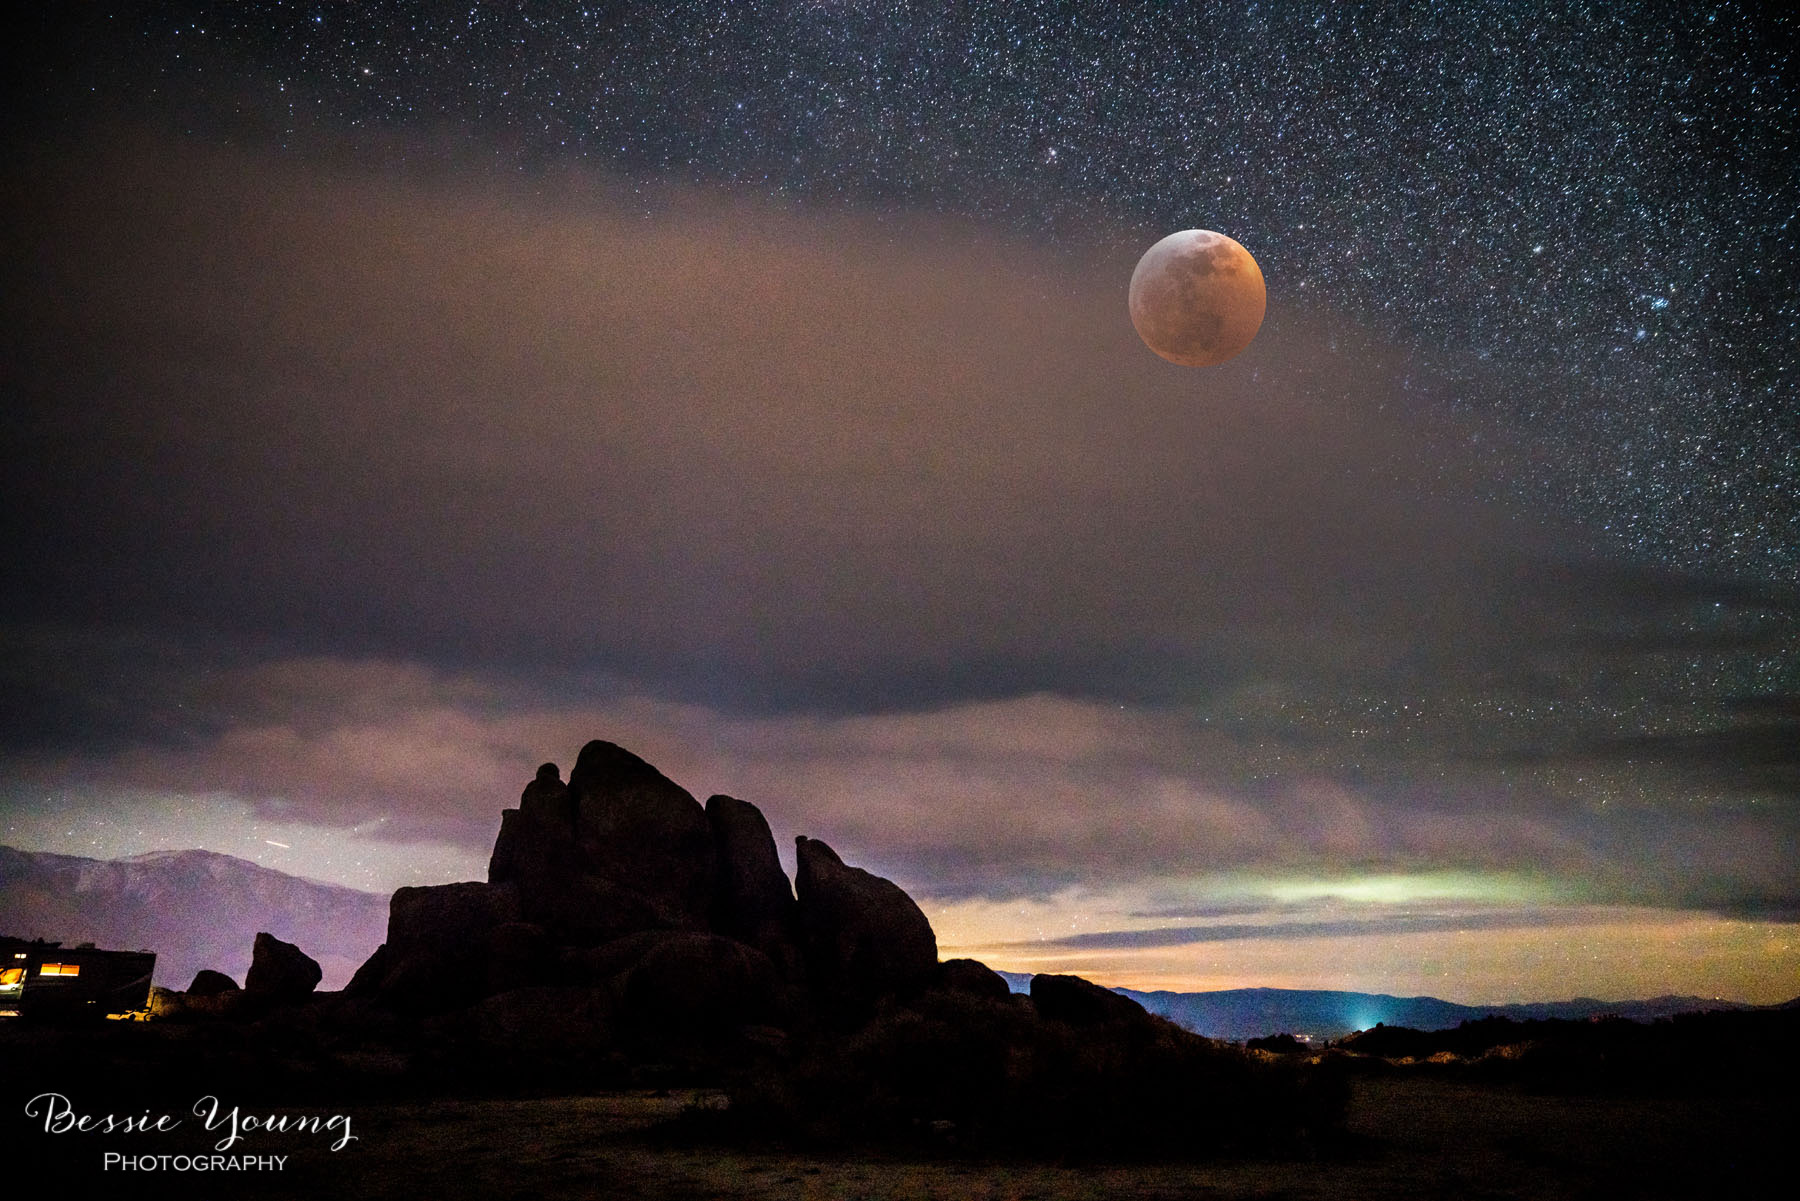
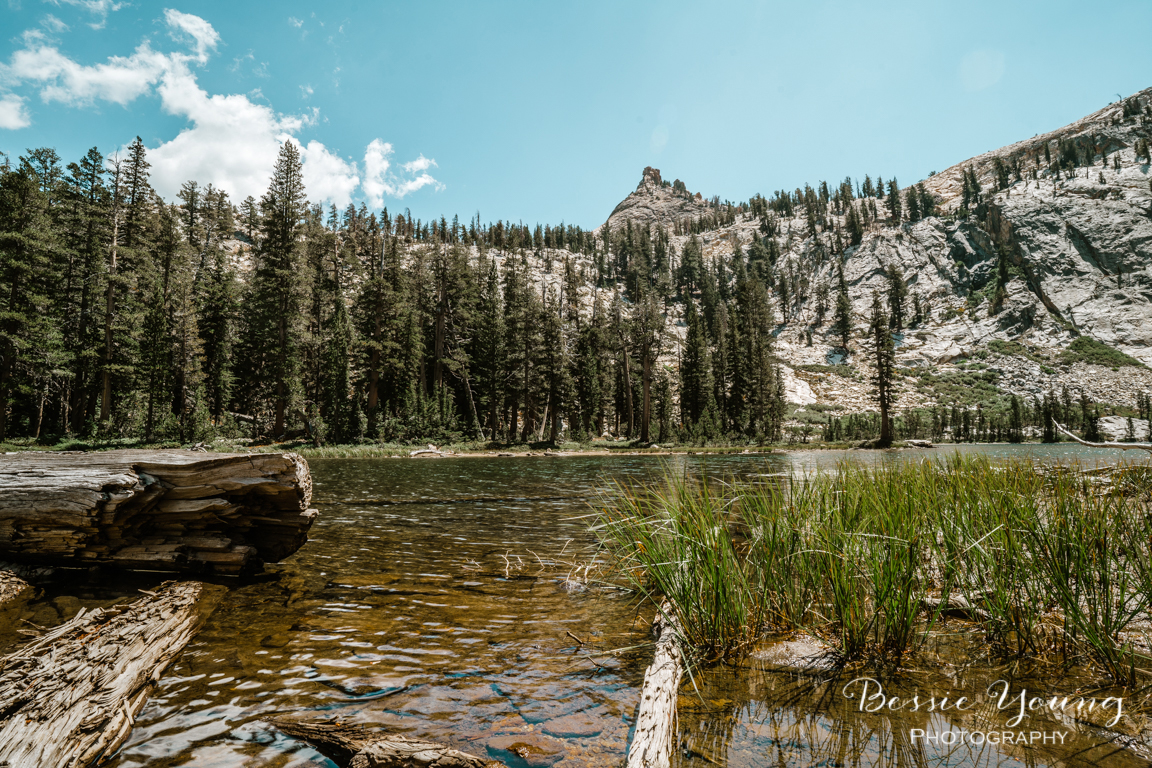
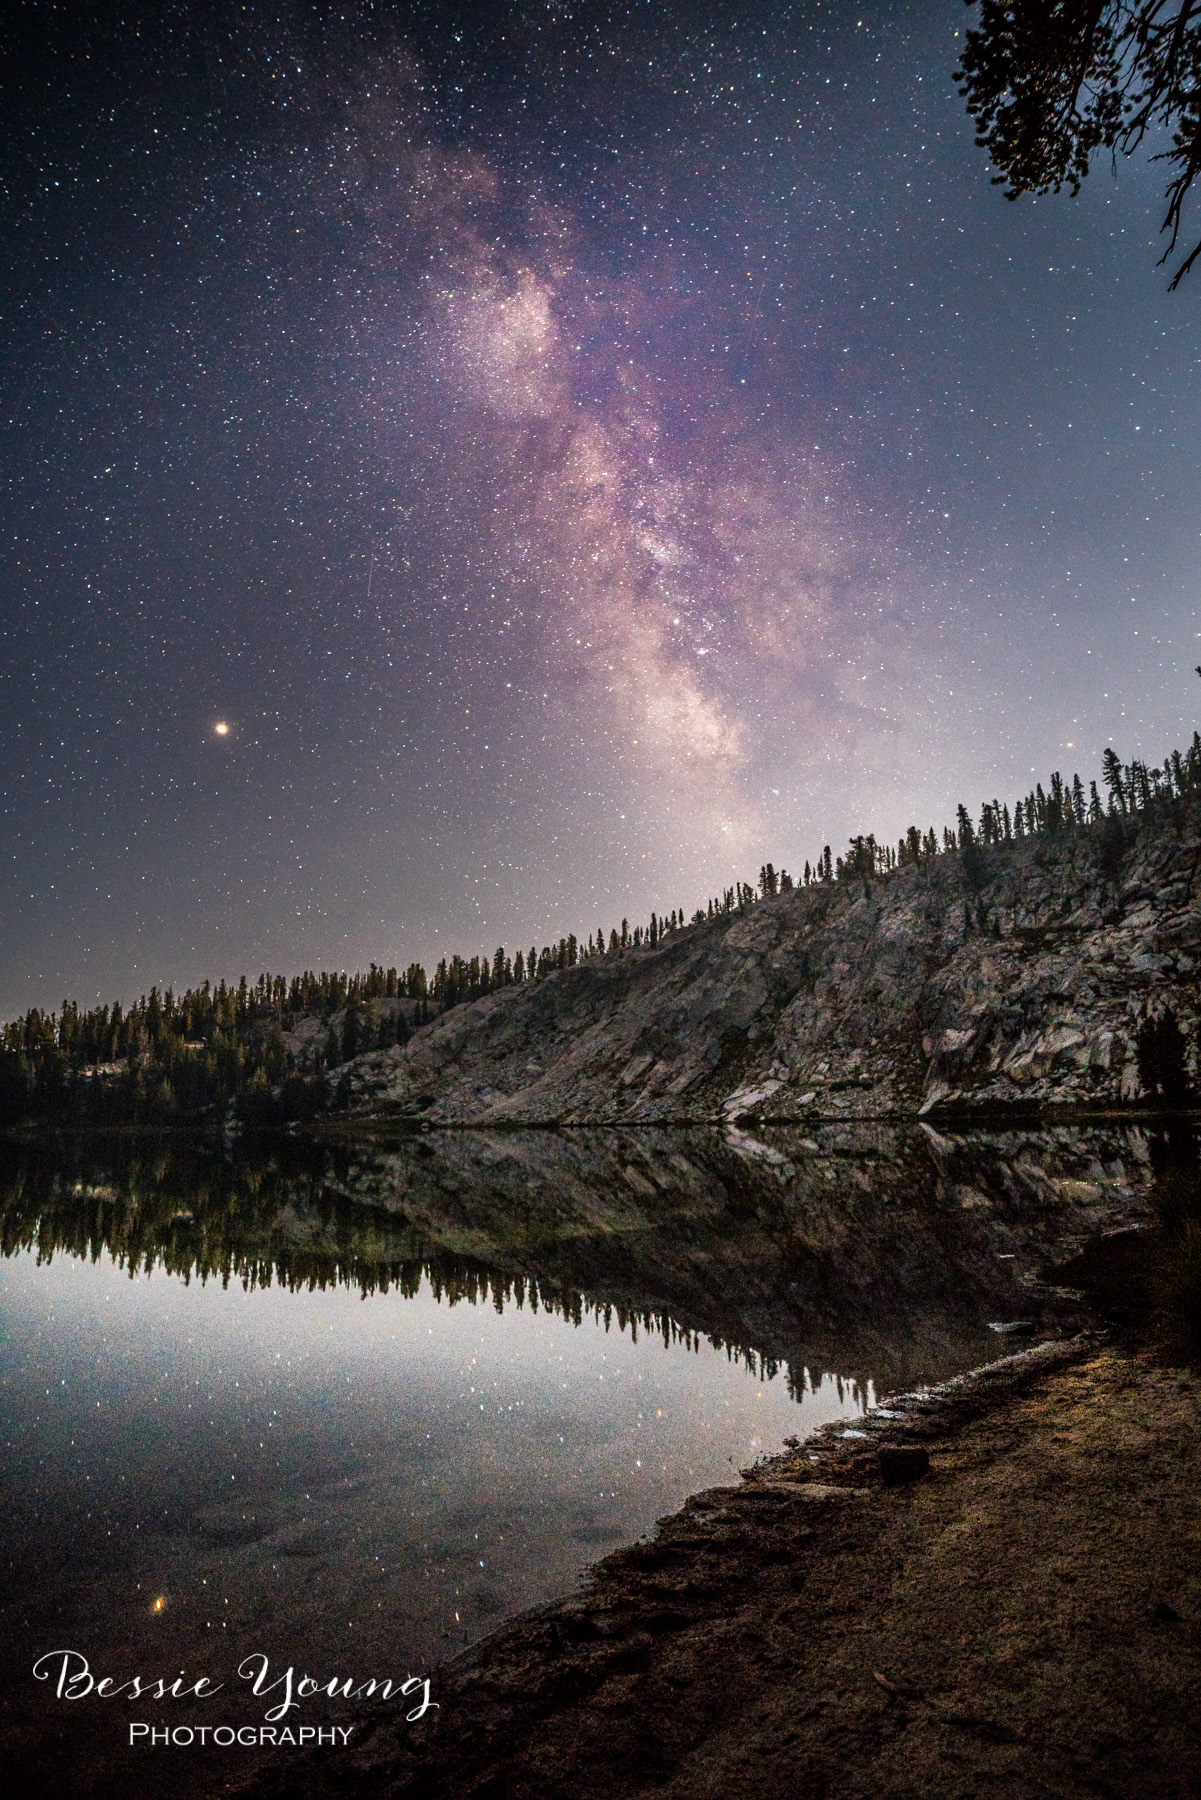
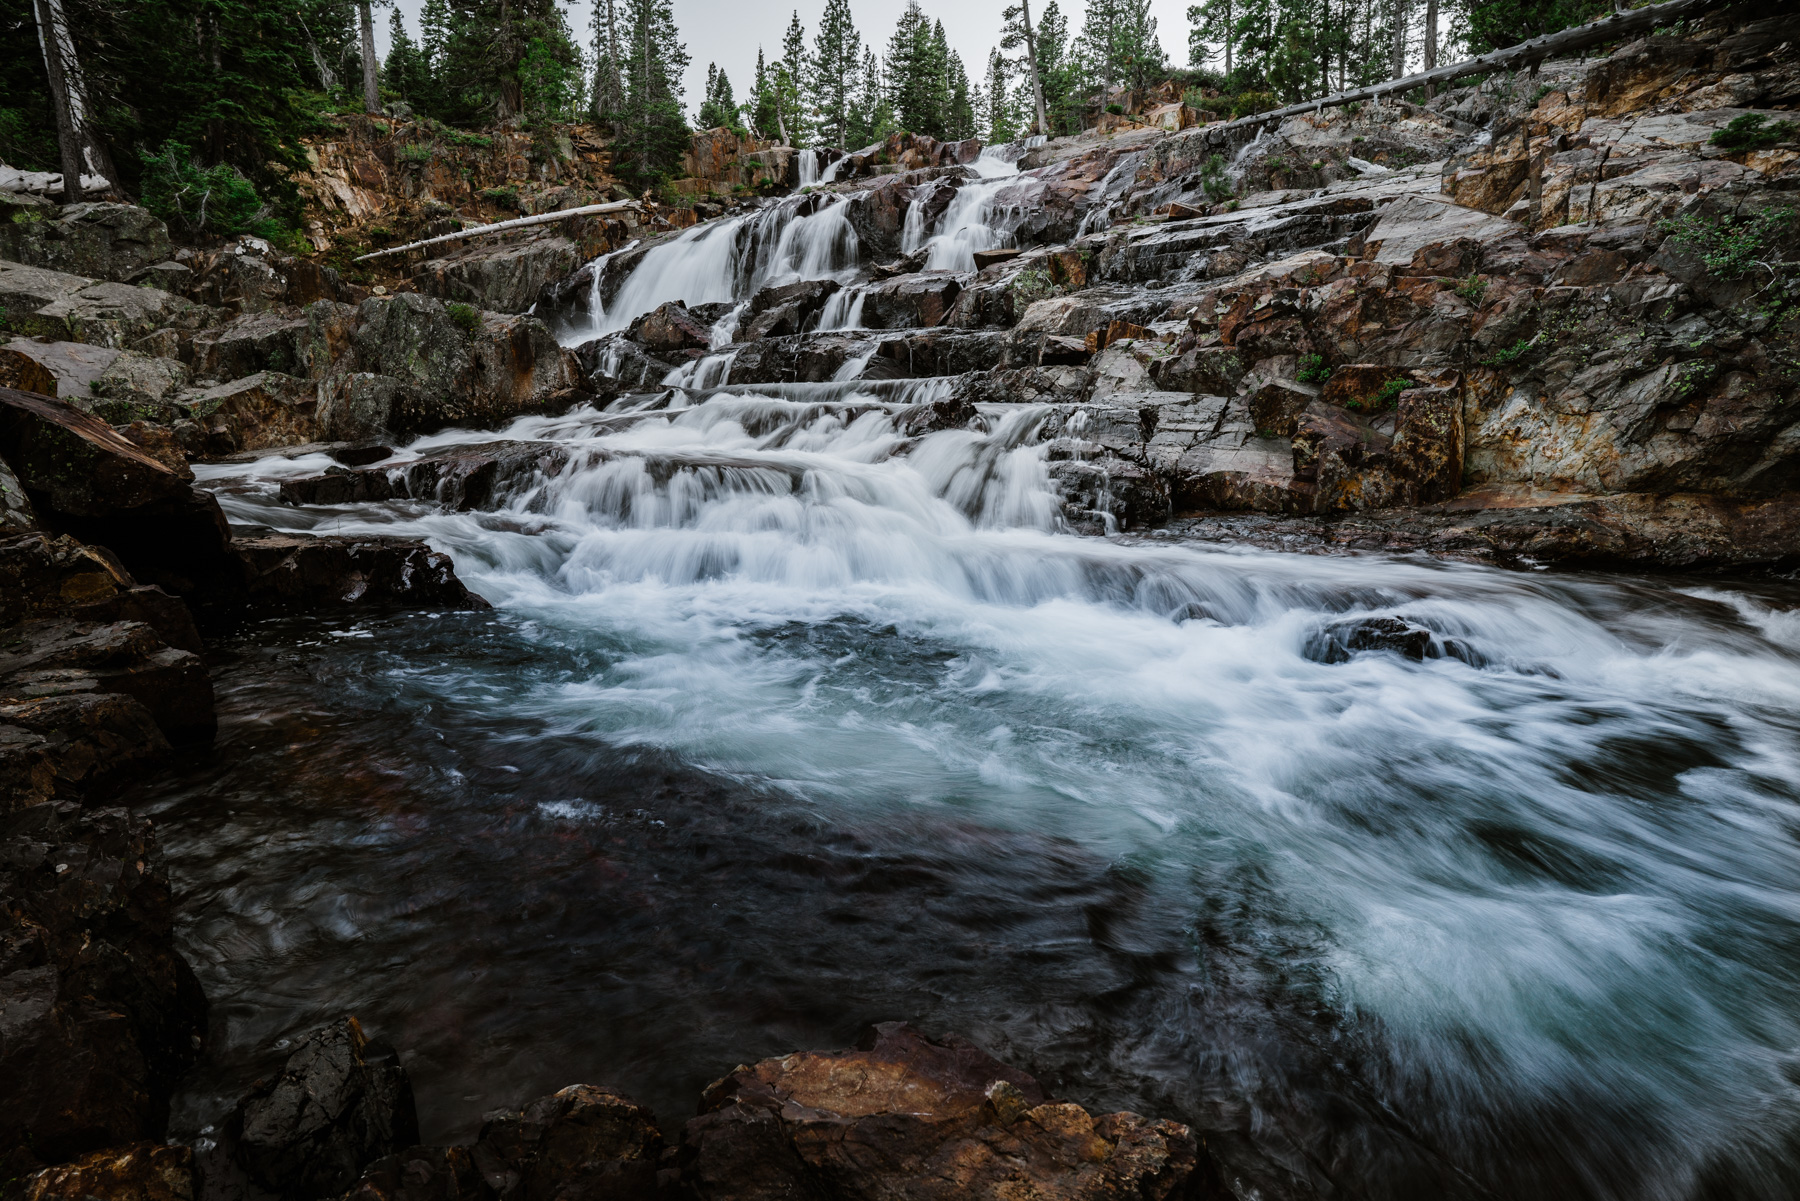
Long Exposure

A long exposure is an image that has exposed for a long time or has a long shutter speed. This technique is typically in low light and used by landscape photographers.

Hot Shoe

The hot shoe is the slot at the top of the camera for adding accessories such as a flash.

Noise

Noise is the little flecks in an image. Sometimes this is also called grain. The higher the ISO the more noise you will have in your image.

Alright, that was alot of info.

Make sure to check out the free download up above if you want to learn more photography jargon. It is an instant download with loads of terms for you to study and become familiar with :)

Are you just starting out in photography? Well welcome to the tribe! I am so excited for you and have made a couple awesome things to help you along your photography adventure:

Let me know what questions you have by leaving me a comment below :)

Bessie


P.s. If you are learning photography and love posts like this then make sure to check out these ones :)

Batis 85mm Lens vs Sony 85mm G Master Lens - Lens Comparison

Batis 85mm Lens vs Sony 85mm G Master Lens - Lens Comparison

Photography Gear

Ever since I started using the Batis 18mm lens I have been extremely interested in Batis lenses.

Batis 85mm vs Sony 85mm G master lens comparison Which Lens Should You Buy For Portrait Photography by Bessie Young Photography

Before we start this lens comparison, if you are looking for more information on the Batis 18mm or the lens comparison video for the Batis 18mm vs. the Sony 16-35mm make sure to check out the lens comparison blog here: Batis 18mm Lens vs Sony 16-35mm Lens

Now, I want to start off by saying that I do not own either of these lenses. I have been debating on grabbing an 85mm lens of some sort, but really didn’t know where to put my money. Do I buy the big boy, the Sony 85mm G Master? Do I spend all the money on the top of the line native lens, or do I save some money and not by a non native lens? Now, I figured if I had that question and that debate, others did too!

So, off I went to compare two lenses that I had my eye on. The Batis 85mm F1.8 vs. the Sony 85mm G Master F1.4 G Master. I was able to borrow these two awesome lenses from my friends down at Horn Photo. On a side note, if you are debating on equipment, or wishing you were able to check out equipment before you made that major purchase, make sure to check out your local camera shop like Horn Photo. You can actually rent gear for the day or the week! This could save you major money in the long run. I absolutely love this option, and have rented gear multiple times throughout the years. Whether I want to do a lens comparison, see if I like a certain item, or if I need something for an upcoming wedding but don’t want to purchase the item. Just rent it!!!

Ok, moving on :)

To start off there are a few huge differences for the Batis 85mm vs Sony 85mm G Master:

  • Price

    • Batis 85mm: $930

    • Sony 85mm G Master: $1800

  • Weight

    • Batis 85mm: 1 lb 3 ounce

    • Sony 85mm G Master: 2 lbs 7 ounces

  • Aperature Ring

    • Batis 85mm: No

    • Sony 85mm G Master: Yes

      • The aperature ring is super cool for video!

  • Aperature capability

    • Batis 85mm: F1.8 - F22

    • Sony 85mm G Master: F1.4 - F16

Batis 85mm vs Sony 85mm G master lens comparison by Bessie Young Photography.jpg

Filter ThreadFront: 67mm

Aperature: F1.8-F22

Length: 3.6 in.

Weight: 1lb 1 ounce

Price: $930


Filter Thread Front: 77mm

Aperature: F1.4-F16

Length: 4.2 in.

Weight: 1.8 lb

Price: $1800


Batis 85mm vs Sony 85mm G Master lens comparision by Bessie young THUMBNAIL.jpg

Now lets talk about actual field experience and photo comparison…

An 85mm lens is typically used for portraits. I am debating on using the 85 as my second lens for backpacking. Right now I use the Batis 18mm and the Sony 24-70mm G Master. What I am thinking about doing is changing out the Sony 24 - 70 G Master with an 85mm. Now, with all that being said, I wanted to do a lens comparison for what these lenses are typically used for, Portraits!

Luckily I have the cutest model in the world that just loves to have her picture taken… my Boston Terrier Yota :) In order to do an accurate lens comparison, I kept my aperature at 1.8 for all the photos. This way I didn’t compare an F1.4 to an F1.8.

In the field and during post processing I noticed a few main things:

  • Bokeh differences

  • Vignetting

  • Chromatic aberration

  • Automatic Focusing

  • Lens Noisiness/ Loudness

Bokeh:

There isn’t a huge difference with the Bokeh at F1.8. The thing I noticed most here was that the Sony had a creamier bokeh and the Batis had more of a swirl that was counter clockwise. If you look at the Batis image, it looks more like you are spinning. Really focus on the images below. Notice the swirl on the Batis? Do you see how the Sony is much more creamy?

Batis 85mm vs Sony 85mm G master lens comparison by Bessie Young Photography Bokeh Comparison.jpg

Vignetting and Chromatic Aberration

So there are two things here and each lens has its fault. The Sony has a bit of chromatic aberration compared to the Batis. The Batis didn’t seem to have any chromatic aberration during my little session with Yota. Now, this was only tested during this session, so this doesn’t go to say that the Batis doesn’t have chromatic aberration in certain scenarios. See the images below.

Now with that the Batis has a bit more vignetting than the Sony. See images below.

Batis 85mm vs Sony 85mm G master lens comparison by Bessie Young Photography Vignetting Comparison.jpg

Automatic Focus Speed and Sound:

Wow, now this is really where there is a major difference. Honestly, this was where my decision was made and where the Batis really took the cake.

The Batis was able to automatically focus quickly, capture movement, and didn’t make hardly a sound. The Sony on the other hand didn’t focus quickly at all. Actually, I wasn’t able to capture a single motion image in focus. Plus, during the focusing, it made the loudest noise ever, and just really annoyed me lol. I am not sure why it was bothering me so much, but it was at the point where I didn’t even want to use it any more. The focusing sound it made was really not awesome. Imaging being at a wedding, where everyone is silent, and your lens is making a focusing/ kind of grinding noise? I think that would ultimately suck. People would start listening to your camera rather than the vows!

Batis:

Sony:


Conclusion:

So, with all that being said, I will definitely be getting the Batis 85mm. There is just absolutely no reason not to! It is cheaper, lighter, focuses quicker, quieter, and the photos are almost the exact same as the Sony 85mm G Master. The aperature goes to F22 which is awesome for Landscape Photography and there is less chromatic aberration. The down side to the Batis is the fact that there is a bit of vignetting and the aperature doesn’t go as wide as the Sony; however, these are definitely things that I can work with.

What lens is your favorite? Leave a comment below.

Would you like to see a certain lens comparison video? Comment below and I can add it to my list :)

Wishing you a beautiful day!

Bessie


How To Take Flower Photos - Joshua Tree National Park Wildflowers

Images For Sale in the BYP Shop-

Click the image to purchase or click the buy me button below.

About 2 weeks ago I came down with a cold and it was something fierce. It sucked. It lasted an entire week! I woke up on Wednesday and I felt like I had been hit by a truck! I thought that it was going to be just a day thing, but man did it last longer.

The ultimate bummer part is that I had plans to go to Death Valley that weekend! I was super hopeful that I was going to get better; however, it just didn’t happen. So… my Death Valley trip got cancelled. It sucked!

Then, after about a week of this not feeling good and having a temperature over 100, I started to feel slightly better, but really not 100%. So another weekend went by of me just being lazy, laying on my couch, and trying to get better.

Finally, after 2 weeks, I was feeling quite a bit better. I started to get the itch. All I could think about was Death Valley and the wildflowers. After deciding I was going to make a trip no matter what, I started to do my research for Death Valley (checking weather and road conditions). To my surprise it was supposed to be in the upper 90’s! Yep, I really wasn’t ready for camping with a low of 65 and a high of 98.

With all that being said, I thought I was going to miss out. I figured it just wasn’t in my cards this year, but then I remembered Joshua tree! I have never been to Joshua Tree and I knew it was supposed to have quite a bit of wildflowers. I checked the weather… High of 75…. Yep Joshua Tree it is!

How To Take Flower Photos Joshua Tree National Park Wildflowers by Bessie Young Photography

The Adventure

Joshua Tree National Park is about 5.5 hours from my place. I left around 11am thinking that this would give me enough time to get to the park, roam around for a minute, and then get a sunset shot… Boy was I wrong lol.

I headed down the freeway and everything was going smoothly until I hit the dreaded LA traffic. I got to San Bernidino and the traffic was terrible. It basically cost me 1.5 hours. So my 5.5 hour trip turned into more of a 7 hour trip which put me in a bit of a time crunch.

Joshua Tree National Park Wildflowers

There are two entrances to Joshua Tree, the North and South. I chose to stay in Indio along Hwy 10 in order to start at the South entrance. Then, my plan was to stay in Yucca Valley for the second night which is near the North side entrance.

When I finally reached Indio, I checked into my hotel, and then I was off to the South side entrance of Joshua Tree National Park.

When I arrived, I had about a half hour until sunset so, I ended up barely making it into the park, pulled over at the first trail I could and walked around.

It was awesome! There were so many flowers blooming and the trail was just what I needed to stretch my legs and get some neat shots of the flowers.

While I was there, I figured it would be the perfect time to talk about how to take flower photos. So, I created the video above for my Youtube Channel, and wanted to put these tips into writing. So, lets get to it!

How To Take Flower Photos by Bessie Young - Joshua Tree National Park Wildflowers Landscape Photography Fine Art.jpg

Tips on How to Take Flower Photos

Ultimately I have 2 types of photos that you may want to get, and the tips to get those photos. I wanted to get you started with taking flower photos because Spring is here!!!

1. How to get that creamy background

  • You need to get at their level. Yep, you have to move your bootay and get down to the ground. Don’t try to stay standing up. This is where most people go wrong.

  • Use a low F stop/ wide aperature. Basically, the lower the number the better in my opinion. Now most lenses will go to F4. This is ok, but ultimately you want to be around F2.8 or lower. If you are just starting out, just make sure that you are at the widest aperature possible for your lense. As I was saying F2.8 or lower is so much better. This is where you are really going to see that creamy background, also known as bokeh. This means that yes, you are going to have to spend a bit of money to get that type of lens; however, it is totally worth it!

See the images below for example. All of these images were taken from ground level at F2.8.

All Images For Sale in the BYP Shop-

Click the image to purchase

2. How to get that amazing landscape shot with the flowers in the foreground

Ok, so do you ever see those images, of the amazing flowers in the foreground, yet some how there is still that awesome landscape in the background? These are some of my favorite images! So how do you get them?

  • You need to again, get down to their level. Get up close and personal with those beauties. This is going to allow you to have the flower in the foreground and then the gorgeous landscape in the background.

  • Use a moderate F value. What do I mean? Basically you will want a good ‘landscape’ F value. I prefer F8 - F11.

  • Focus on the mountains in the background. Whalah! You get your beautiful landscape wildflower image!

3. Other Tips

  • Type of Lens to use: Really, anything that will allow you to focus manually and to shoot at a wide aperature. For me, I use my Sony 24-70mm G master F2.8

  • Type of camera to use: You really need a camera that will allow you to shoot manual mode. If you don’t have this, then you are going to be hard pressed to try to use these tips. I use the Sony A7riii and the Sony A7rii

  • Time of year to take flower photos: Pretty much any time of year that there are flowers! Now, if you want wildflowers you will need to shoot in the spring time.

    • For desert wildflowers you will want March and April, but these little flowers die quickly so you really need to keep an eye out on how the flowers are doing. There are awesome websites that you can check. The National Park Service website even has cool wildflower ratings :)

    • For foothill wildflowers you will want to go out during March and April.

    • For high mountain wildflowers you will want sometime in late July and early August.

    • Note: This all depends on the weather and the rain accumulation. You will need to check. These months are all a rough estimate.

  • Time of day to take flower photos: Sunrise or sunset. These are the ultimate best because you are going to get that soft gorgeous light. If you happen to be shooting during the middle of the day, you can always block the flower with your shadow to help mellow out the light.

How to Photograph Flowers - Joshua Tree National Park Wildflowers 2019 By Bessie Young Photography.jpgHow To Take Flower Photos Joshua Tree National Park Wildflowers by Bessie Young Photography

Do you have any tips on how to take flower photos? If so, comment below. I would love to add them to the list :)

This blog is all about community over competition. Let’s help each other, be friends with each other, learn together, and grown together.

Wishing you the very best!

Bessie


P.s. Love this post? Check out these similar ones:

Photography Apps I Use

There are so many dang Apps out there how do you even begin to choose what Apps to use?

I have tried alot of apps. Like a lot a lot and to be honest most of them kinda sucked. It took alot of installing, time wasted, and uninstalling to find good apps.

Now, there are many different apps I use for photography. Some for landscape scouting, some for backpacking, some for editing on my phone, and some for social media. Yes… like I said… I use alot of apps. So lets get into it.

Are you learning Photography? Check out the freebie page to get you started! I have created a bunch of awesome freebies to help you out :)

Photography Apps I Use

Essential photo apps for by Bessie Young Photography.jpg

Photography Apps For Landscape Photography:

I created a post on this one. I use two main apps for my landscape photography. Head on over that way to check that out. In short I use Back Country Navigator and Photo Pills. You can read the entire post all about why I chose these two apps here:

2 Essential Apps for Landscape Photography

Photography Apps For Social Media:

  • Unfold

    This little app is pretty awesome for instagram stories. It allows you to create absolutely beautiful picture stories for different occasions. I use it for when I create a new blog post, a new Youtube video, or add new products to my BYP Shop.

  • Snapseed:

This is one of the best photo editing apps I have found out there. If I take a photo with my phone, I can edit in in snapseed and not worry about how it is going to look on my instagram feed. It is beautiful! So now you can take some pretty awesome images on your phone and share away. Yay!!

Other:

  • Keep Notes

    I keep all my notes on this. It is seriously the best and helps me stay organized. I use it for my business and for personal use. You can create different notes with different lists.

  • Playmemories

    This is the app I use to hook up to my phone. The app makes it to where my phone becomes a remote. It also allows me to share the photos from my camera straight to my phone!

  • GPS Test

    This little handy dandy app does quite a bit. The thing I use it for the most is to help my GPS lock onto the satellites when it is having a difficult time. It also shows the compass, how quickly you are moving, the date and time, sunset date and time, and where all the satellites are in the sky,

  • My Tracks

    This tracks me everywhere. It is actually what I use for backpacking, hiking, walking, or running. It shows my speed, my distance, elevation gain and more! It allows me to add way points such as different cool landscape features, lakes, and so forth. I love this one specifically for the distance, speed, and elevation gain.

  • Blog

    This is a Squarespace app. It is freaking awesome! When I come up with a blog idea I can just open this app and start a new blog post. To me this is just amazing. This way I don’t have to carry a notebook and I won’t have to let an idea slip away. Once I get back to my computer I can just open up my website, and BOOM! there it is! The new post that I started :)

Do you use any of these apps? If not, what apps do you use? Leave a comment below. This is a community for photographers to help other photographers. Lets create a list of awesome apps so we don’t have to keep wasting our time with the install / uninstall game. Leave a comment below with the app you use and why.

Wishing you the absolute best!

Bessie


Things You Need to Know Before Starting a Blog

Ok, so you are ready to start a blog! How awesome is that! I am so dang happy for you, but I do want to give you a few things that you need to know before actually starting the blog. Things that I wish I knew before I started mine :)

There are many things that absolutely no one talks about. Everyone likes to keep things all peachy and like ‘oh its a dream’, ‘i make all this money’, ‘im living my best life’ , ‘its so easy’, ‘i only work when i want to’…. blah blah blah

I am just going to say all those are true to an extent. People like to take things to an extreme. They want everything to look so good. You know, the grass is always greener on the other side, but sometimes things can suck. Sometimes as a Creative or as an Entrepreneur you can get frustrated, you can be jealous , you can be discouraged, you can get let down, but don’t worry. That happens to EVERYONE! Even the ones that want to claim overnight success….

Don’t get me wrong, running your own business is freaking awesome. Having a blog and helping others is awesome too! There are a ton of awesome things as a blogger, I just wish people would be more upfront about the bad things. You see, I am a bad things kinda girl. I want to know all the negatives to something. This way, I can decide if I want to attempt it or not :) I can make an informed decision rather than get let down because my expectations were so dang high.

So with all that said, everyone can start a blog. Everyone has the potential to make it an amazing business. Everyone has the potential to make money, but here is what people do not warn you about:

Things You Need to Know Before Starting a Blog

Things you need to know before starting a blog by Bessie Young Photography - Tips for Entrepreneur.jpg

1.You are not going to get rich quick:

I have subscribed to alot of newsletters about being a photographer, a creative, and entrepreneur. I get so many emails saying things like ‘I made $200k in one month off of one blog’

Ugh! Those emails frustrate me. I am not going to lie. There is a message behind those emails saying that you can get rich quick. That you should be able to create 1 blog post and BOOM success.

Well, my friend, that is just not the case. I am sorry. I wish it was, but honestly, if it was, I would probably have a big house and not be sitting in a crap apartment.

You are not going to earn $10k your first month of blogging. Hell, you probably won’t even earn that in your first year of blogging.

2. The learning struggle is REAL!

There is a huge freaking learning curve when it comes to being a small business. There is that same learning curve with just blogging. You cannot accomplish anything if you are not willing to learn. You need to dig dig dig and learn all you can. As soon as you feel like you know it, you probably need to learn more.

It will be overwhelming and you will want to quit. You won’t see any success and it is incredibly discouraging, but do not give up.

Explore and try new things. Don’t be afraid to invest in yourself and your business.

3. Nothing Ever Happens Overnight

This relates to my get rich quick scheme.

You most likely won’t get 100,000 subscribers by offering a cheat sheet. You probably won’t get 100,000 subscribers in your first year. Building a brand, building a business, and building a blog is going to take alot of your time.

4. It takes alot of your time and effort:

I have heard many people say that they schedule their blogs out for the entire year in 1 or 2 weeks. This makes it sound like they only work 2 weeks out of the year… hmm…. wouldn’t that be sweet? Well, I am just going to say that this entire process is going to take alot of work. Most of my blogs take me hours to create. I’m serious. They take me hours. This blog in itself has taken me 2 hours already and I'm not even finished! CARAZY.

Now some people can write quicker that others. I am not the fastest writer there ever was, but I am not slow either. I like to create good content. Plus adding images to your blog takes quite a bit of time as well.

Bonus Tip! You will need to know how to use Photoshop Elements, or some sort of tool to add words to your images.

5. There are a lot of ups and downs…. a lot of downs…

Once you start making money your income is going to fluctuate. You are going to make money one month and none the next. You need to prepare for that. It is ok. Don’t worry, but just know that it will happen.

6. You will compare yourself to other people and you will feel really bad about where you are in your journey

We are the worst when it comes to comparing ourselves to others. Especially now with social media. We are constantly scrolling looking at everyone else’s awesomeness, everyone else’s success… guess what…

What you see are peoples highlight reels. You never see their behind the scenes. You never see them on the floor crying, you never see them with their mascara smeared and them sitting with a big ole tub of ice cream on the couch, you never see them getting ready to throw in the towel. You only see their highlights, their successes, and what they are proud of.

This is going to be hard and this is probably one of the hardest things, but try your damdest to put your blinders on and focus on where you are going. Try to not compare yourselves to others because it will just make you feel bad and it will make you want to quit.

Now with all that being said, blogging is pretty darn awesome. It gives you huge flexibility with your lifestyle. It can be a full time job, a side hustle, and really whatever you want to make it!

How to Start a Blog and Make Money for Beginners by Bessie Young Photography.jpg

I just wanted to give you some truth so you know what you are getting yourself into.

If you are interested in blogging make sure to check out my ‘ How to Start a Blog and Make Money ‘ post. It will help you get everything in line to make sure you are successful.

I hope you all enjoyed this blog! If you did, leave me a comment below, or even better, share it with your friends!

Wishing you the absolute best!

Bessie

Super Blood Wolf Moon Landscape Photography

I have the absolute best people in my life. My sister and her husband originally told me about this natural phenomenon. Then, a couple weeks later a couple of good friends asked me if I heard about it. Finally, a few days before the occurrence, my mom sent me a text telling me about it. Seriously though? How cool is that? I have such an amazing support system for my photography. Whenever something cool is happening, I know that I will hear about it one way or another.

Super Blood Wolf Moon Landscape Photography by Bessie Young Photography.jpg

The Planning

When my sister told me about it, obviously I began researching it. When is it? What is it? Where to see it? I mean all the things 😊 If you want to learn a bit more about all the details make sure to check out my recent post on ‘How to Photograph the Super Blood Wolf Moon’. This blog will give you probably a bit more information than you were expecting about this awesome show that the moon put on.

My original plan was to head out into the foothills of my hometown to get some pretty images; however, that plan got thwarted when the weather called for rain. I’m not talking a slight drizzle either. I’m talking about a down pour. As I started to search for places to go and check the weather, it seemed like the majority of the State of California was going to be cloudy during the Super Blood Wolf Moon. Northern California was calling for thunderstorms and Southern California was calling for full cloud coverage. So, I got a little discouraged and figured I wasn’t going to be able to see it. Then I found the spot! The spot that might have a potential to be partially clear during the Super Blood Wolf Moon…. Lone Pine and the Alabama Hills.

The Adventure

The question was, do I want to spend all the time, money, and effort to head over to the Alabama hills with pretty good odds not to see it? Well, I’m somewhat of a gambling girl, so I hopped in the car on Sunday to go and take my chances.

The drive to Alabama Hills is about 5 hours from my town. Not too terrible, but leaving on a whim left me in a little bit of a hurry. The moon was supposed to rise around 5:30pm and I left at 11:30. The eclipse wasn’t supposed to happen until 8pm or so; however, I really wanted to get an image of the Super Moon coming up over the mountain tops.

I rolled into Alabama Hills about 4:30. PERFECT Timing let me tell you. I was super stoked because I also got to get some amazing sunset images. I mean seriously though, I took way too many sunset pictures. The clouds kept changing and things just were getting better and better. It was absolutely gorgeous. I wish I could share all the images with you.

Alabama Hills California Sunset - Fine Art Photography by Bessie Young Photography
Rising Super Blood Wolf Moon January 2019 by Bessie Young Photography Landscape Photography

Actually, I got so caught up in taking sunset images, I didn’t leave much time to set up for the moon rise. Luckily, I was able to get both sunset and moon rise! YAS!

The sky was partially cloudy, which made for some amazing sunset pictures, but it sure made me nervous for the moon. I wasn’t sure if I was going to be able to see it at all.

Since the Blood Moon wasn’t supposed to begin until around 8pm, I had plenty of time to go grab some dinner. After dinner I headed back out. Let me tell you friends, it was freaking windy and cold. Like cold, cold cold. I had my down jacket on, a beanie, and hand warmers, and man it was cold.

Rising Super Blood Wolf Moon January 2019 by Bessie Young Photography

Getting the Shot: The Super Blood Wolf Moon

Super+Blood+Wolf+Moon+Landscape+Photography+by+Bessie+Young

As I sat in my car, I looked up at the sky to only see clouds. You could see portions of the clouds lit up due to the brightness of the moon, but no moon! I sat there for a bit with the moon peaking out and then hiding behind the clouds. It played this game for almost an hour. As it started to peak out, I noticed that the eclipse had stated.

Well I guess I am not going to get the shot after all

The most frustrating part of this whole thing was that the clear sky was just at the edge of the moon. Yas, it was inches away from being visible. How frustrating is that?!

So, I figured, I would get all my stuff set up just in case. I opened my door, and the wind almost tore it off. To the East was the clouds and the eclipse occurring right before my very own eyes, being hidden by the clouds. To the West there was a lightening storm. Where I stood was open skies with the wind whirling around me.

Super Blood Wolf Moon Landscape Photography January 2019 by Bessie Young Photography

As I set up my tripod, in the dark, the wind wanted to blow the entire set up over. I tried to get a few shots of the moon with the cloud cover and was completely unsuccessful. Eventually, I moved the car to block the wind. I sat there… waiting….

I could see the moon beginning to turn red, but the cloud cover was just barely too much that all my images were turning out blurry. All of them were blurry!!! I got a couple mediocre shots and the moon went completely behind the clouds for what seemed like forever. It was over, I was packing up. No reason to sit and stare at the night sky hoping for something to happen.

I packed up all my things and sat in my car. Checked my phone, and just tried to get a bit warm. Then, out of no where, the MOON!!!! The full blown MOON!!!! I scrambled, cursed a little, and then jumped out of my car, set my equipment back up and BOOM! I FREAKING GOT THE SHOT!

It was awesome and I am so dang thankful that I didn’t drive away when I was thinking about driving away!

Super Blood Wolf Moon Landscape Photography January 2019 by Bessie Young Photography

What Were My Settings for the Moon Images?

I played around quite a bit with my settings and eventually settled on

Shutter Speed: 1 second

ISO: 2000

Aperture: 5.6

I hope you all enjoyed this blog. Were you able to see the Super Blood Wolf Moon? Did you photograph it? If so leave a comment below . I would love to hear about your trip!

Wishing you nothing but amazing adventures and pretty pictures!

Bessie


P.s. Did you like this blog? Check out these ones as well:

How to Photograph the Super Blood Wolf Moon January 2019 | How to see it in California

It’s tonight! The Super Blood Wolf Moon Lunar Eclipse is happening and the sky is going to be putting on a pretty darn awesome show. I am sure even just hearing the name you are interested, but what is it and how do you see it? Here is everything you will need to know about this phenomenon :

Super Blood Wolf Moon January 2019 | How to see it in California

When is the Super Blood Wolf Moon?

Sunday January 20th into Monday January 21st, 2019 (depending on where you are located in the USA)

The Lunar Eclipse will begin around 11:30 ET which means about 8L30 Pacific time.

You will want to start watching the sky around 7:30pm. if you are in California. As the Earths shadow begins passing in from the lower left. Totality will be around 8:40 and the moon will return to its normal appearance around 9:40pm.

What is the Super Blood Wolf Moon?

This term is being used because there are several events happening all at once. It sure is a mouthful but lets break it down a little.

Super Moon: A super moon occurs when the full moon is at its closest point to the earth.

Wolf Moon: Every month has special names to describe the full moon. For January it is Wolf Moon. It originates from the Native American folklore.

Blood Moon: This is going to be the coolest part of the show. This is the lunar eclipse where the moon will turn a blood red color as it passes the Earths shadow.

How to see it:

accuweather.brightspotcdn.com.jpg

You will need to be outside, during the right hours, with clear open skies. If it is cloudy, which is what the California weather is calling for, you unfortunately will not be able to see it.

Most of the US will have the ability to see the Super Blood Wolf Moon this January. You will not need any special equipment to see it. Just your own two eyes.

How to photograph it:

You will need a variety of things…

Super blood wolf moon January 2019 | How to see it in california by Bessie Young Photography
  1. Plan out your location - scout it out to find the best composition

    • Decide if you want a large landscape shot, or just the moon shot. This will determine your lens.

  2. Make sure it is clear skies

  3. Be at your location well before the occurrence

  4. Tripod

  5. Camera

  6. 100-400+ mm lens

    • This will be more for just a moon image. If you want more of a landscape you will use a 70-200mm lens

  7. Head lamp

  8. Camera remoted

  9. Warm clothes to make sure you are comfy and warm. This way you are having fun rather than miserable and only thinking about how cold your toes are :)

  10. Snacks and drinks to make sure you are comfortable and enjoying the show

That’s it! Now get out there and freaking get some amazing moon images! Are you going out to see the show? Comment below and let me know where you will be viewing it from, what kind of gear you plan on using, and all the deets!

I can’t wait to see your photos!!

Bessie

Things You Need to Do During Your Off Season

Alright fellow photographers, creatives, and entrepreneurs… there is one thing that you are going to have to accept…. Entrepreneurship is seasonal. Once you accept that the better you will be. Business will get slow, and then it will speed up. It will really really speed up to where you feel like you are spinning, and then it will slow down to a snails pace leaving you questioning if everything is ok.

Everything is ok. This business of ours is just seasonal. Try to be ok with that and you will feel a lot better. Plus, once you are ok with that you will be able to really take advantage of your down time.

Let me give you a little story of where I am coming from. At the beginning of last year, I was so slow that I began to worry. Ok, worry is an understatement but you get where I am going. I sat there sad, kinda depressed, and ultimately worthless.  During the summer, especially the late summer, things got crazy. I was staying up late, getting up early, and I even started to drink an energy drink here and there which I don’t ever do.

I honestly wondered if I could keep up with it. I was also super worried because I didn’t have the time to blog. My blog fell completely off the radar. I mean it was so far gone it wasn’t even funny. Months went by without me blogging and that little voice inside my head wouldn’t leave me alone. It was telling me I wasn’t good enough, I needed to do more, blah blah blah.

If I would have just been ok with the idea that this business is seasonal then I could have accomplished sooooo much during my off season to where I felt amazing during my busy season. So here are some things that you just need to do during your down times in order to not get overwhelmed, frustrated, depressed, and just plain overworked during your busy times:

Things You Need to Do During Your Off Season by Bessie Young Photography

Things You Need to Do During Your Off Season

Update your portfolio

I mean this one in 2 different ways. The first way being, now is the perfect time to schedule some styled shoots! You have a bunch of free time so why not make the most of it. Do something for you. Create a shoot that you have been dreaming of. Let your creativity flow. This isn’t only good for your mind, and your soul, it is good for your portfolio. Show people what you are capable of.

Secondly, update your portfolio on your website. Show your favorite images. Your best images. Not all the images. You want to attract your people, your tribe. Update your portfolio to resemble who you want to attract.

Network!

There really is no better time to get together with other creatives, other entrepreneurs, and other like minded people. I don’t mean this to mean reach out to people to make money. I mean actually network with people. I mean talk to them. Be friends with them. Help them. Give them your gifts. This is huuugggeee in growing your business in the long run.

Learn

As small businesses we tend to not invest in ourselves. This is terrible because honestly that is really the best place to put your money. I think learning from others is such an important thing. This is how we grow as individuals. You have to spend money to make money friends. This is the perfect time to sign up for a workshop, schedule a mentorship,

Start a personal project and learn by being creative and playing.

It takes a lot of effort to get your business moving forward and to keep it moving forward. We have to stay current, up to date on all the things, and just “in the know” (no I’m not cool enough to say that, but I said it anyways).

Devise a Plan and Schedule

This is where I went wrong last year during my down time. I freaked out and just didn’t do anything, but I could have been planning all the things. So my thoughts here are start planning your posts. I mean all the posts… Pinterest, social media, blog posts.  

This is really where you are going to help yourself during your busy season. You can schedule posts. This way when you are busy, you don’t have to worry about blogging, or pinning, because guess what? It is already completed for you. You did it during your down time! How awesome is that really though?

So, devise a plan for your blogs. Create the blogs, and then schedule them out throughout the year. Now you have content for half the year, or maybe even the entire year, or at least until your next down time.

Enhance Your Brand

During the slow season you can really take a fine look at your business. You can see it from every perspective.

Have a real honest conversation with yourself and how your brand looks. Is it cohesive throughout all the things ie social media, websites, emails, newsletters, etc?

Can you simplify anything for your customers to make things smoother?

Does your brand attract your tribe? Does it attract your target market?

Work on your website

This goes along with the above ‘enhance your brand’.

We always put off working on our website. It is one of the last things we creatives want to even think about, but it is freaking important friends! Does your website resemble your brand? Does it attract your target market? Is it easy to navigate? And be honest, how old are the photos on your website?

I hope this blog was helpful and just got you thinking about how you can really take advantage of the down time. Also, hopefully it will help you not fret when those slow times do come around, because believe me they will come whether you try to avoid them or not.

Honestly though, the slow times are one of the best times for your business. They are the times where you can really nurture your business back to health. These are the times that you can make everything shiney again. Embrace the slow times, appreciate them, love them, and be ok with working on all the other things that we didn’t realize came with running a business J

Wishing you the very best!

Bessie


P.s. Love this post? Check out these similar ones:

How To Print Photos From Your Phone - Print on Location

How To Print Photos From Your Phone - Print on Location

How To Print Photos From Your Phone - Print on Location by Bessie Young Photography

I am a HUUUGGEEEE believer of printing your images. Yes, I think it’s crazy important. In todays world, everyone thinks that me most important thing to have is digital images. Well I do believe those are important printing your images is just as important. You need to hold your images in your hands, hang them on your walls, put them in photo albums, share them with friends, and just do all the things with them.

As you guys know I do both Landscape photography and Portrait photography. I love love love to spoil my customers, I love to be able to hand an image to someone and see their expression, and I just love printing pictures lol. (how many times can I say that?! So, I have been on the search to print images on location.

I figured it would be the coolest thing to be at a portrait session or a wedding and be able to hand a printed image to my people. We are so used to getting things right now, and I want to be able to provide that kind of service.

I also wanted to be able to be at a family party and hand a print over to my sisters after a silly selfie :O

So, the search began and I found the coolest little printer you ever did see!!! It is called the

Polaroid Zip

How to print photos from your phone instantly - print on location by Bessie Young Photography.jpg

There are so many things I love about this little printer.

  1. It is small which is perfect for packing around while you are on a shoot, or just putting in your purse while you are at a party

  2. It is easy to use! All you need to do is download the app and boom!

  3. The battery lasts a long time

  4. The printer prints quickly

  5. The picture size is awesome. Perfect for wallets!

Now, with the pro’s always comes the cons. So here are the things I don’t like:

  1. Only holds 10 sheets of paper

  2. The color is off

  3. The quality isn’t that great

Now, the con’s really aren’t that bad because I only print in black and white. If I am going to print a photo for my clients I do not want to print it in color because then they might get the idea that their images will look like what is printed. If you print black and white, they get the picture, the immediate satisfaction, and great customer service. They walk away smiling and super excited to see the rest. Not to mention it places a small little thought in their head that prints are awesome!

There is also a bunch of other super cool printers that are incredibly similar. So check out these tiny little printers:

Are you learning Photography? Check out the freebie page to get you started! I have created a bunch of awesome freebies to help you out :)

I hope you guys enjoyed this little post :)

If you want to see more gear make sure to head on over to my gear lists!

Wishing you the very best and super pretty pictures!

Bessie

Photography Jargon for Beginners- What do all those words mean?

Photography Jargon for Beginners

What do all those words mean?

Ok, so you are just getting into photography and your head is swimming because of all the ‘photography words’ like aperture, shutter speed, stopping down, and so forth.

Don’t worry friend, I have been there and done that! Seriously, it can take a long time to figure it all out and what the heck everything actually means. That is why I created this Free Instant download photography cheat sheet just for you! It has 9 of the most common photography words and what their meaning is. YAS!

No more guessing, or researching, no more googling. Now you can have the information in one easy to download guide that you can print out or keep on your phone :) How cool is that?

Are you just starting out in photography? Well welcome to the tribe! I am so excited for you and have made a couple awesome things to help you along your photography adventure:

Let me know what questions you have by leaving me a comment below :)

Bessie


P.s. If you are learning photography and love posts like this then make sure to check out these ones :)

Black and White Lightroom Presets by Bessie Young Photography

Black and White Lightroom Presets

by Bessie Young Photography

Ok so we all know how much I absolutely love love love black and white images. I mean I may go to the ‘im a bit obsessed’ with black and white images. So…. It is officially official friends!!! I finally freaking made my black and white lightroom presets available! For Realz!

I love lightroom presets for a few different reasons:

  1. they will make your life easier

  2. they will make your editing faster

  3. they are easy to use

  4. they will help you find your style

  5. they will help you learn editing

  6. they will help you learn Lightroom

So for me, these are just a win win win. Now, let me tell you something friend. These are no traditional presets. No. They are not just a bunch of presets where you either like them or don’t. Oh not for this girl. I had to make them amazing. I had to make them worth it. I had to make them phenomenal. So how, or what did I do, to do that?

Well, I went above and beyond is what I did!! I decided to create what I needed when I was first starting out as a photographer. No, I didn’t know lightroom or how to edit, but by golly I was going to be a photographer so I needed a little bit of help. So check this out, the best thing about these presets are that you have complete control over all the presets with an easy to use interface which allows you to create the look you want one click at a time! I have included easy and quick contrast edits, vignetting edits, film edits, and more! Plus… these presets include everything from the standard black and white image, to the light and airy black and whites, and even to the very popular moody black and whites.

Black and White Lightroom Presets by Bessie Young Photography - Learn how to edit - Learn photography

Alright, so enough already, here are the deets:

Whats included in the BYP B+W Presets:

  • 8 Black and White Original BYP Presets (these are all 1 click edits!)

  • 4 FREE Black and White Presets

  • Contrast Settings

  • Vignetting Settings

  • Film Grain Settings

  • 3 color filters

Do you have any questions? Please please please comment below with your questions or send me a message via this contact form.

I am so dang excited about these presets and so dang excited to see your creations that come from them! Make sure to tag #bypshop or #thebypshop in your social media posts so I can see all the goodness!

Wishing you nothing but amazing, beautiful, and oh so awesome black and white photos!

Bessie


Love this post? Want to seem more? Check out these similar posts here:

ND Filter vs. No Filter

ND Filter vs. No Filter

Photography Tips and Tricks

Have you ever really wondered what an ND filter really does? Does it really make that much of a difference when it comes to taking a landscape photo? Well, my friend, I conducted a test for you guys so you can see what a 10 stop ND filter looks like in comparison to no filter at all.

Yes, I hiked 7+ miles one way just to conduct this test for you ;)

ND Filter vs No filter Landscape Photography Tips and tricks by Bessie Young Photography Landscape Photography.jpg

So let me start off with saying why I love my 10 stop ND filter. It is pretty amaze balls for when you are trying to do a few things:

  1. Photograph in the harsh light

  2. Photograph waterfalls or moving water

  3. Wanting to take a long exposure

I particularly like to use the 10 Stop ND Filter when I am wanting to have that nice smooth water effect, but I cannot have a long exposure. The Filter allows me to crank my shutter speed to 20” and lower during the middle of the day. How cool is that?!!

A Neutral Density filter allows a photographer to control the exposure in an image very easily. The filter stops light reaching the camera sensor, therefore allowing us to leave the camera with a higher aperture for a longer amount of time.

This blog post is strictly to show you the difference between using a filter and not using a filter. We will get into how to use an ND filter and what they are all about in a different post. So stay tuned!

When do you find yourself using a ND filter? Comment below and let me know :)

10 Stop ND Filter vs. No Filter:

Side by side comparison:

These photos were taken at high noon at about 10,000’ elevation with all the glare imaginable due to the granite backdrop and the water.

Photograph with No Filter:

Settings: ISO 64 | f14 | 1/60”

ND Filter vs No filter Landscape Photography Tips and tricks by Bessie Young

Photograph with 10 Stop ND Filter:

Settings: ISO 64 | f14 | 20”

ND Filter vs No filter Landscape Photography Tips and tricks by Bessie Young Photography

So there you have it. The 10 stop ND filter vs. No filter. I thought this would just be a fun comparison and help you see the difference between using a ND filter vs not using one :)

Wishing you nothing but a beautiful day!

Bessie


P.S. Did you love this post? Want to see more photography tips and tricks? Check this out here:

A New Logo for Bessie Young Photography!

A New Logo for Bessie Young Photography!

A new look for my business!!! I am so dang excited to announce my new logo! Holy moly! I have been wanting to create a new logo ever since I started my photography business, but I just didn't really know what to create. This logo has been years in the making and it is finally here! Woohoo!!!

So, what is the deal? Why did I do this really?

I created my original logo in a rush. I started my business and needed a logo, so insert quick pretty logo here. Now ever since then I had plans to change this logo, but I just didn't really know what to change it to. Now after 3 years of being in business I finally figured it out! Ya, 3 years seems like a long time, but it really did take me that long. This entire time I have been trying to really nail down where exactly I want to go with this photography business of mine and how I really want to brand it.

Starting out, my business was jumbled with a  bit of confusion on whether I was a landscape photographer or whether I was a portrait photographer. Well if you have stuck with me this long you know I am both! I definitely am not into pigeon holing myself because I love both equally; however, it has been a struggle to figure out how to work them both into by business without confusing people lol.

To be honest, I still struggle with it a little bit, but I think it finally worked. Now how does this all pertain to my logo? My logo was basic. Very simple and easy; however, I really wanted something that meant something to me and matched my brand. You see I am a landscape photographer and an outdoor portrait photographer that incorporates landscapes into the session. I mean how cool is it to be able to take landscape pictures with beautiful people in them? Well, its freaking cool! I digress.... back on topic :)

My logo needed to match my brand and it took me awhile to figure out exactly what that was. One day I started designing logos on paper. Really trying to make my logo beautiful and something that actually meant something to me. Something that I was going to be truly proud of. Well after multiple attempts I finally got it! It took me almost a full day to design this thing in Photoshop and I am just so dang proud!  So without further a due here it is the new Bessie Young Photography Logo:
 

New Logo Bessie Young Photography.jpg

So what do you think? I would love to know your opinion! Now each item in this logo means something personal to me and I am just so stoked!!!

So of course I had to make some cool Swag!!! Check out the new travel mugs and coffee mugs:

Thank you so much for all your encouragement and support. You are amazing and I don't tell you enough how much I appreciate you. Thank you!


I hope you all enjoyed this blog. Leave a comment below and let me know what you think.

Wishing you a very beautiful day!

Bessie

How To Take Night Photos

How To Take Night Photos

Photography Tips and Tricks

So, how in the literal heck do you even start to take photos at night in order to create a beautiful jaw dropping image?

All Images For Sale in the BYP Shop-

Click the image to purchase or click the buy me button below.

Well my friend I am here for you! I am super excited to share this video and blog with you for so many reasons, but the main reason is because for years, and years, and years I struggled with taking night photos.
I spent countless hours researching it. I had so many failed attempts testing out the tips and tricks that I was reading online , or in photography magazines, or watching YouTube videos .
I did all the things and still could not get good night photos. My pictures were dark, muddy, grainy, blurry, and everything bad about a photo.

After years of trial and error I have finally compiled some of the main tricks that I've learned and taught myself when it comes to taking night photos. I am so beyond excited to share this information with you guys to really help you , and help you not have to spend all the time doing all the research.

Tips on How To Take Night Photos

How To Take Night Photos by Bessie Young Photography Tips and Tricks - Landscape Photography.jpg
  1. Use a full frame camera

  2. Use a fast wide angle lens (aperture 2.8 or below)

  3. Invest in a good tripod

  4. Check the weather - make sure that the sky is going to be pretty much clear skies

  5. Make sure the moon is small or that there is no moon at all. A mood that is over a quarter moon is going to be way too bright.

  6. Scope out your location and find the best composition while it is day time and light outside.

  7. Focus your lens while it is day light! Oh my gosh this is huuugggeeee! I couldn't ever figure out how to get those tack sharp images. I would always "focus to infinity" because that is what everyone said to do, but guess what.... THAT DOESN'T WORK! Infinity has a little bit of wiggle room and that is really going to make or break your image. So after you are done scoping out your location (tip 5). Set up your tripod and focus your camera. This way, when it is dark outside you will not have to try to figure out how to focus. You will know already where to focus your camera at and you will be good to go!

  8. Shoot in Raw

  9. Start off with settings at ISO: 2000 | F2.8 | Shutter 10" and go from there. You are going to have to play around just like any other landscape photo. Make sure that you get a few variations and that way you can pick your favorite in post.

  10. Get a star app (I use PhotoPills)

Now go out there and try these photography tips and tricks on how to take night photos!

Leave a comment below and let me know what your favorite tips are or if you have any additional tips that I didn't mention :) . Don't forget to share this with all your shutter bug friends!

Wishing you nothing but a beautiful day!

Bessie


P.S. Did you love this post? Want to see more photography tips and tricks? Check this out here:

Do you take the time? Landscape Photography Tips and Tricks - Sunflower Fields in Sacramento

Do you take the time?

Landscape Photography Tips and Tricks

Sunflower Fields in Sacramento

So if you don't know by now I absolutely freaking love road trips! Growing up, that is what we did.... we took road trips. We saw some amazing things, made some of the best memories, and had the absolute most fun. Since going out on my own, I continue to road trip. It is like it is ingrained in every inch of me, it is part of my gypsy soul. To be honest, I crave road trips.

The Story

This past weekend I ended up taking a road trip up to Washington. On the way home it was late. I mean late late late. I was in Redding at about 3 in the afternoon which meant hitting Sacramento during the worst portion of the day, rush hour. This would then have me arriving around 10pm.

So I decided to stay in Redding for awhile in order to avoid traffic (i hate traffic). I went to a local brewery which was absolutely amazing called Fall River Brewery. Then I stopped at my go to out food, Chipotle. Finally, it was time that I could head on down the road and not hit crazy traffic in Sacramento.

As I was passing through Yolo there was this amazing sunflower field. I had to decide, do I stop to take some pictures, or do I just keep rolling because if I stop I am going to get home crazy freaking late...

Landscape Photography Tips and Tricks - Sunflower Fields in Sacramento by Bessie Young Photography

Do you stop to take the time?

So it was decision time... do I stop or do I continue? Obviously I ended up stopping, but it really got me to thinking.

There have been so many times that I have been on a road trip and didn't want to stop to take the time to take a photo. I regret each and every one of those times, but for some reason I still have that little voice inside my head saying that I don't need to stop, that it isn't a big deal, and that I am on a schedule.

Now am I really on a schedule? No not really. So why is it that we get so caught up in the have to get there right now kind of mentality? Why is it that we feel guilty for taking the time to stop? Why is it that we put a time schedule on E V E R Y T H I N G?

You see, it is difficult to schedule seeing the sunflower fields bloom especially when you live over 4 hours away. So why was I struggling so hard? Honestly, I do not have an answer for you, but I figured if I am struggling with this, then maybe you are too.

Take the time to do what you love

I wanted to encourage you to take the time. Take the time to do what you love. Yes, it might put you back 10 minutes or even an hour, but guess what... at least you took the time to get some epic photos.

We really need to stop rushing ourselves. We really need to stop and enjoy the roses, or sunflowers in this instance. Maybe you have no idea what I am talking about, maybe you think I am crazy for struggling with this, but maybe, just maybe you needed to hear this. I am hoping that I can encourage you to take the time for you. Take the time for what you love. In the end you will not regret it, you will only regret what you didn't do.

There have been way too many times that I regret not stopping. I missed out on some epic shots, but I am learning. I am growing, I am trying to get better, trying to quiet that silly voice inside my head.

You see, if I wouldn't have stopped I would have missed getting these epic shots:


This is my little message to encourage you to keep doing what you love, to stop and take the time to do what you love, and to not feel freaking guilty about it.

I hope you enjoyed this blog, and the video. Do you struggle with this? Leave a comment down below. I would love to chat with you!

Until next time my beautiful friend,

Bessie


p.s. do you like this post? Check out these similar ones:


Things don't always go as planned - Backpacking Devils Bathtub Graveyard Trailhead

Things Don't Always Go As Planned....

Backpacking Devils Bathtub

Landscape Photography by Bessie Young

Earlier in July I set off for a 4 day 3 night backpacking trip into the Ansel Adams Wilderness. The Graveyard trailhead starts at Edison Lake in Fresno California. The original plan was to stay at Devils Bathtub for a night and then head over to Graveyard lake for the remainder of the trip. Well let me tell you, things don't always go as planned.

The Trip to Devils Bathtub

The trip started off hot. The weather was calling for highs of 70 and lows in the lower 40's. The first day was a tad bit warmer than expected, but I started in the late morning so it wasn't too hot. I hiked from Edison lake to Graveyard Lake having to take quite a few stops to let Yota, my Boston Terrier, take a breather and cool off. We made it to the lake with plenty of time to enjoy the evening, set up camp, cook dinner, and just relax.

That night seemed incredibly warm, but I didn't think much of it. I didn't have my thermometer on, so I thought it was just my metabolism being heightened from the long walk in and the big pasta dinner I ate that evening.

Devils Bathtub Hike Details:

Distance: 4.5 miles one way

Elevation Gain: 1,551 feet

Trail Type: Out and back

Lake Elevation: 9,167 feet


Things don't always go as planned - Day 2

After packing up all my gear I headed off to Graveyard lake as planned. The day was getting hotter and hotter and with that I was getting a little concerned that Yota would be able to finish the hike.

About halfway to Graveyard I decided to take a break. You see Yota is a dog that will definitely out walk me, but not on this day. She wasn't panting hard, her tongue wasn't large, but she kept laying down every time I would stop. This was just weird. She is always out in front chasing lizards along the way. The break was the moment that I needed to make a decision. Was I going to head back to Devils Bathtub or continue on to Graveyard. As I sat there contemplating my day, Yota kept falling asleep. She was just so tired.

The Decision

I knew from the moment that I decided to take a break I was going to carry Yota. I might be overly cautious, but I couldn't imagine if anything happened to her. 

My choices were to hike to Graveyard which was all uphill, or head back to Devils Bathtub which was all downhill. Now Yota is 22 pounds and adding 22 pounds to an already 35ish pound pack is quite a big deal for me. So I decided to go with the flow, take it easy on myself, and head back downhill to Devils Bathtub.

Backpacking Devils Bathtub Graveyard Trailhead - Landscape Photography by Bessie Young Photography - California Hiking Trail

Ultimately it ended up being a really nice day after accepting the fact that I wasn't going to be able to see all the pretty lakes that I wanted to see.

When I got back to Devils Bathtub I ended up taking a nice long swim in the lake and then relaxing on the beach for the afternoon. After my lazy afternoon I set up camp and started to scope out my area in order to get ready to take some pretty sunset images.

That night I made sure to turn on my thermometer to see how cool it got. It ended up only getting down to 58, mind you it was supposed to be in the low 40's. Ya, so much different that what was forecast.

So, the moral of the story is to really just go with the flow. If I wouldn't have gone back to Devils Bathtub I woudn't have gotten some really pretty pictures and early morning shots. I also wouldn't have been able to just relax and enjoy the moment, the breeze, the fresh mountain air, and just being in nature.

I hope you all enjoyed this blog. Have you been to Devils Bathtub or Graveyard lake? If so leave a comment below . I would love to hear about your trip!

Wishing you nothing but amazing adventures and pretty pictures!

Bessie


P.s. Did you like this blog? Check out these ones as well:

Should I Quit? - Photography Tips

Should I Quit?

When is the right time to quit?

This is a question I have asked myself throughout this photography journey. Should I quit? I'm not the best at what I do, hell I'm only half decent to say the truth.

As I look at other photographers work I sit there is utter amazement and awe. I have so much to learn and so far to go before.... before I make it.

Am I a fraud? You know the saying is, fake it until you make it, but what if we never "make it"? What is making it anyways? When do you decide to stop? When do you decide to stop trying, to stop pursuing your dreams? When do you finally recognize that you won't "make it"?

I was talking with my dad the other day and asking him when do you decide enough is enough? When do you give into the pressures of society and just stop pursuing your dream? When do you decide that you are just wasting your time?

My dad just looked at me and smiled. He took a deep breath and said

Oh sweet Bessa, you never stop. You are never wasting your time pursuing your dream. you never stop doing what you are passionate about, and you never stop doing what you love. Why would you?

So I ask you this my beautiful friends, why would you stop? Why do we believe this false idea that we aren't good enough? You are good enough. Let me just repeat myself on that... YOU ARE GOOD ENOUGH!

When should you quit? The answer is never. Not as long as you love what you are doing. You should never quit, never give up, and never stop trying. If you are loving what you do why would you quit? 

So what if you aren't the best. So what if you don't make if... for whatever that might mean to you. If you have passion to create then just freaking create. If you love what you are doing then never stop doing.

Never quit my beautiful friends. Never stop creating.

Bessie


p.s. do you like this post? Check out these similar ones:


Camera Gear for Backpacking

Camera Gear for Backpacking

What's in my bag

Recently I was out backpacking on my first trip of the year and I thought what better time than to make a video about camera gear for backpacking!?

Camera Gear For Backpacking Landscape Photography by Bessie Young Photography.jpg

I'm not going to lie, I debated on making this video because I was freaking exhausted. Yes... I had just hiked a bunch in the heat and all I wanted to do was zone out, but I got my lazy booty outta my chair and made this video just for you!

So, here are all the Camera Gear for Backpacking Things:

1. Camera and Lens:

  • Sony A7rii
  • 18mm Batis f2.8.
  • 24 - 70mm G master f2.8

2. Filters:

3. Cleaning Kit

4. Spare lens cap

5. Batteries:

  • Sony batteries
  • Anker Battery pack

6. SD Cards: Bring all the SD cards :)

7. Tripod

8. Peak Design Clip and foot

That's it!

Let me know what camera gear you take backpacking in the comments below.

Wishing you a beautiful day and dust free photos!

Bessie


p.s. do you like this post? Check out these similar ones:


How to Photograph Waterfalls - Glenn Alpine Waterfall South Lake Tahoe

How to Photograph Waterfalls

Glenn Alpine Waterfall South Lake Tahoe

Landscape Photography

If you don't know by now, I am completely obsessed with waterfalls. I love going to new places and searching for waterfalls. They are so much fun to photograph and just amazing to be around. The rush of the river, the sound of the water, and the creative touch that you can add to each photo is beyond awesome.

So a few weeks ago I just so happened to find myself in South Lake Tahoe for an amazing Destination wedding. You guys, it was freaking awesome! I ended up going up the night before, and like I always do, I had to get out of the hotel and find a pretty landscape image. I am always saying "take advantage of where you are".

I have been to South Lake Tahoe a bagillion times; however, I have never been to the Glenn Alpine Waterfall near Fallen Leaf Lake. To be honest I didn't even know it existed. So off I went to catch a pretty waterfall landscape photograph during sunset.

The drive took about a half our from the boarder of California and Nevada. The road was pretty much a one lane road and quite rough, but the waterfall was beyond beautiful!

Let me tell you, I could have stayed here all night just sitting by the water, but the mosquitoes were out in force. They weren't your average mosquito either. They were like pterodactyl mosquitoes. So unfotunately I had to leave before I became one big mosquito bite.

If you get a chance, make sure to stop by the Glenn Alpine Waterfall along the Glenn Alpine creek in South Lake Tahoe. It is right off the road only about 200 feet and totally worth the trip.

How to Photograph Waterfalls:

  1. Use a low shutter speed for smooth water
  2. F 6.3 - F11 for a good depth of field
  3. Keep your ISO low (like always)
  4. Shoot when there is soft light (best at sunset or sunrise)

These steps will get you a nice smooth beautiful waterfall image.

Have you ever been to Glenn Alpine Falls or are you also obsessed with shooting waterfalls? Leave me a comment. I would love to hear about your trip and see your tips for shooting wateralls :)

Wishing you nothing but the very best!

Bessie


P.s. Did you love this post? Check out these similar ones: